Tutorial: Bridge assets, Swap and LP (v3) on Blast via Sushi
A step by step guide to engage with Blast vis Sushi
- Date
- Mizu

A step by step guide to engage with Blast vis Sushi

In this tutorial, we will walk you through how to bridge assets to Blast, as well as perform a swap and LP on Blast via Sushi UI.
Bridge assets to Blast
- Visit the Blast Bridge.
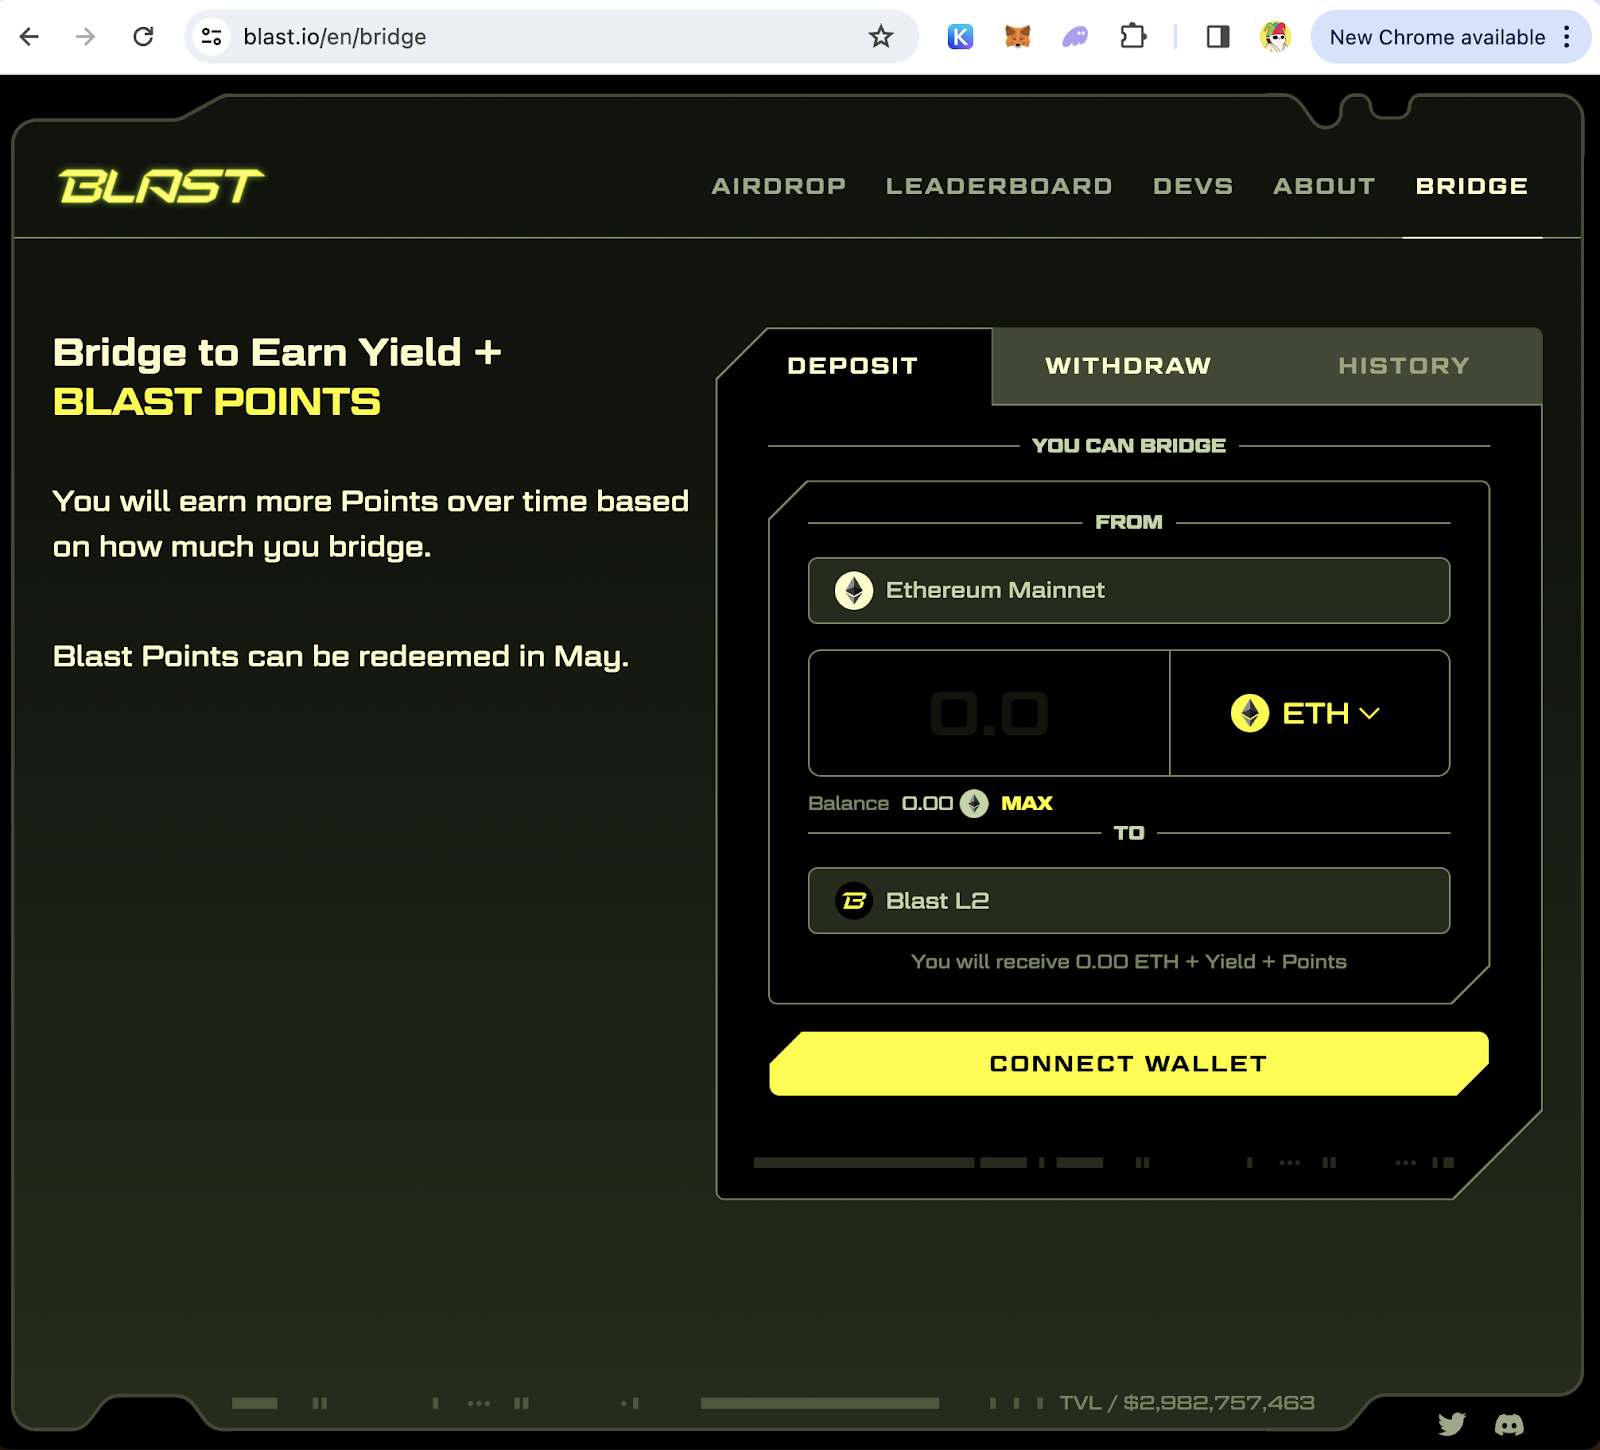
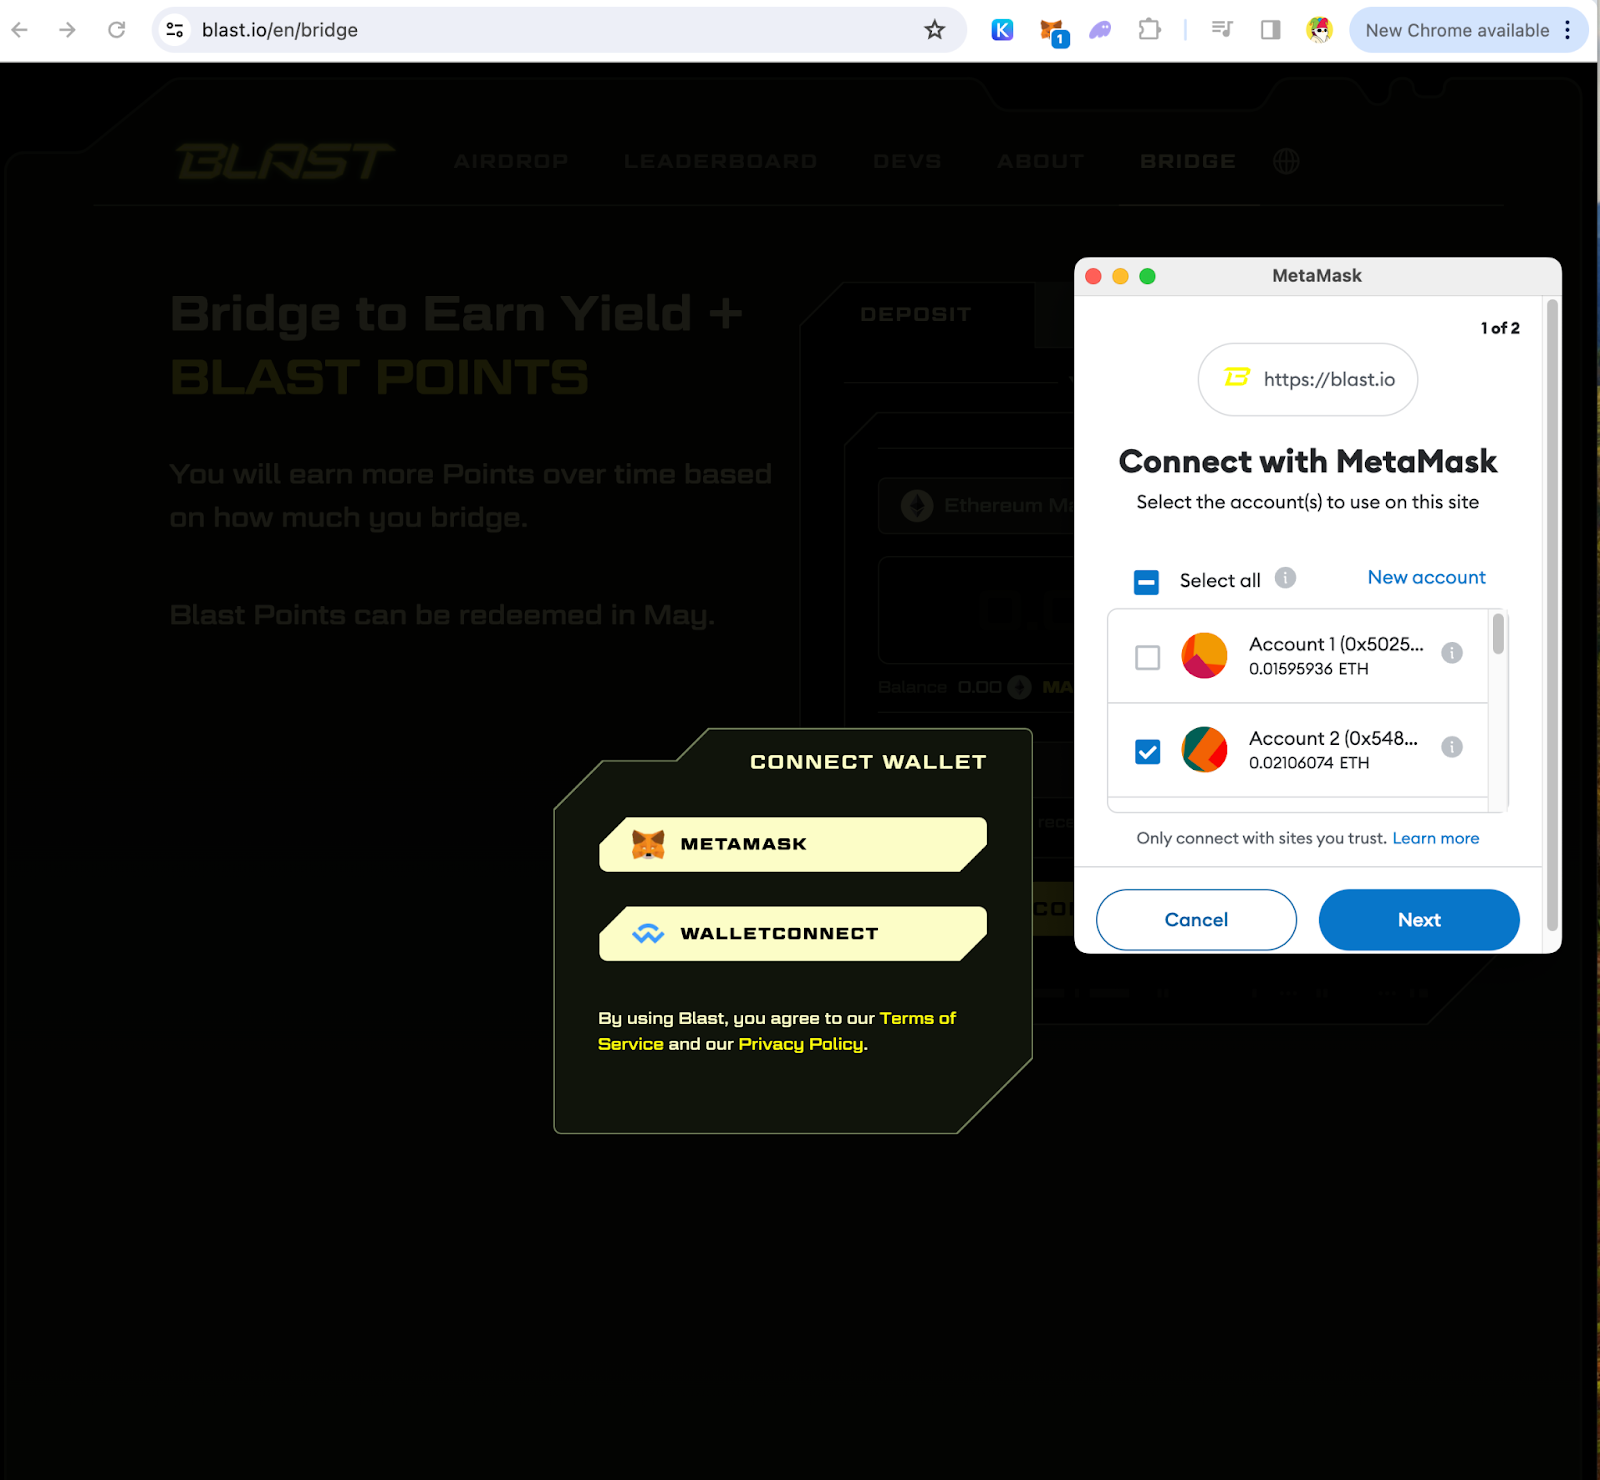
- Connect Wallet
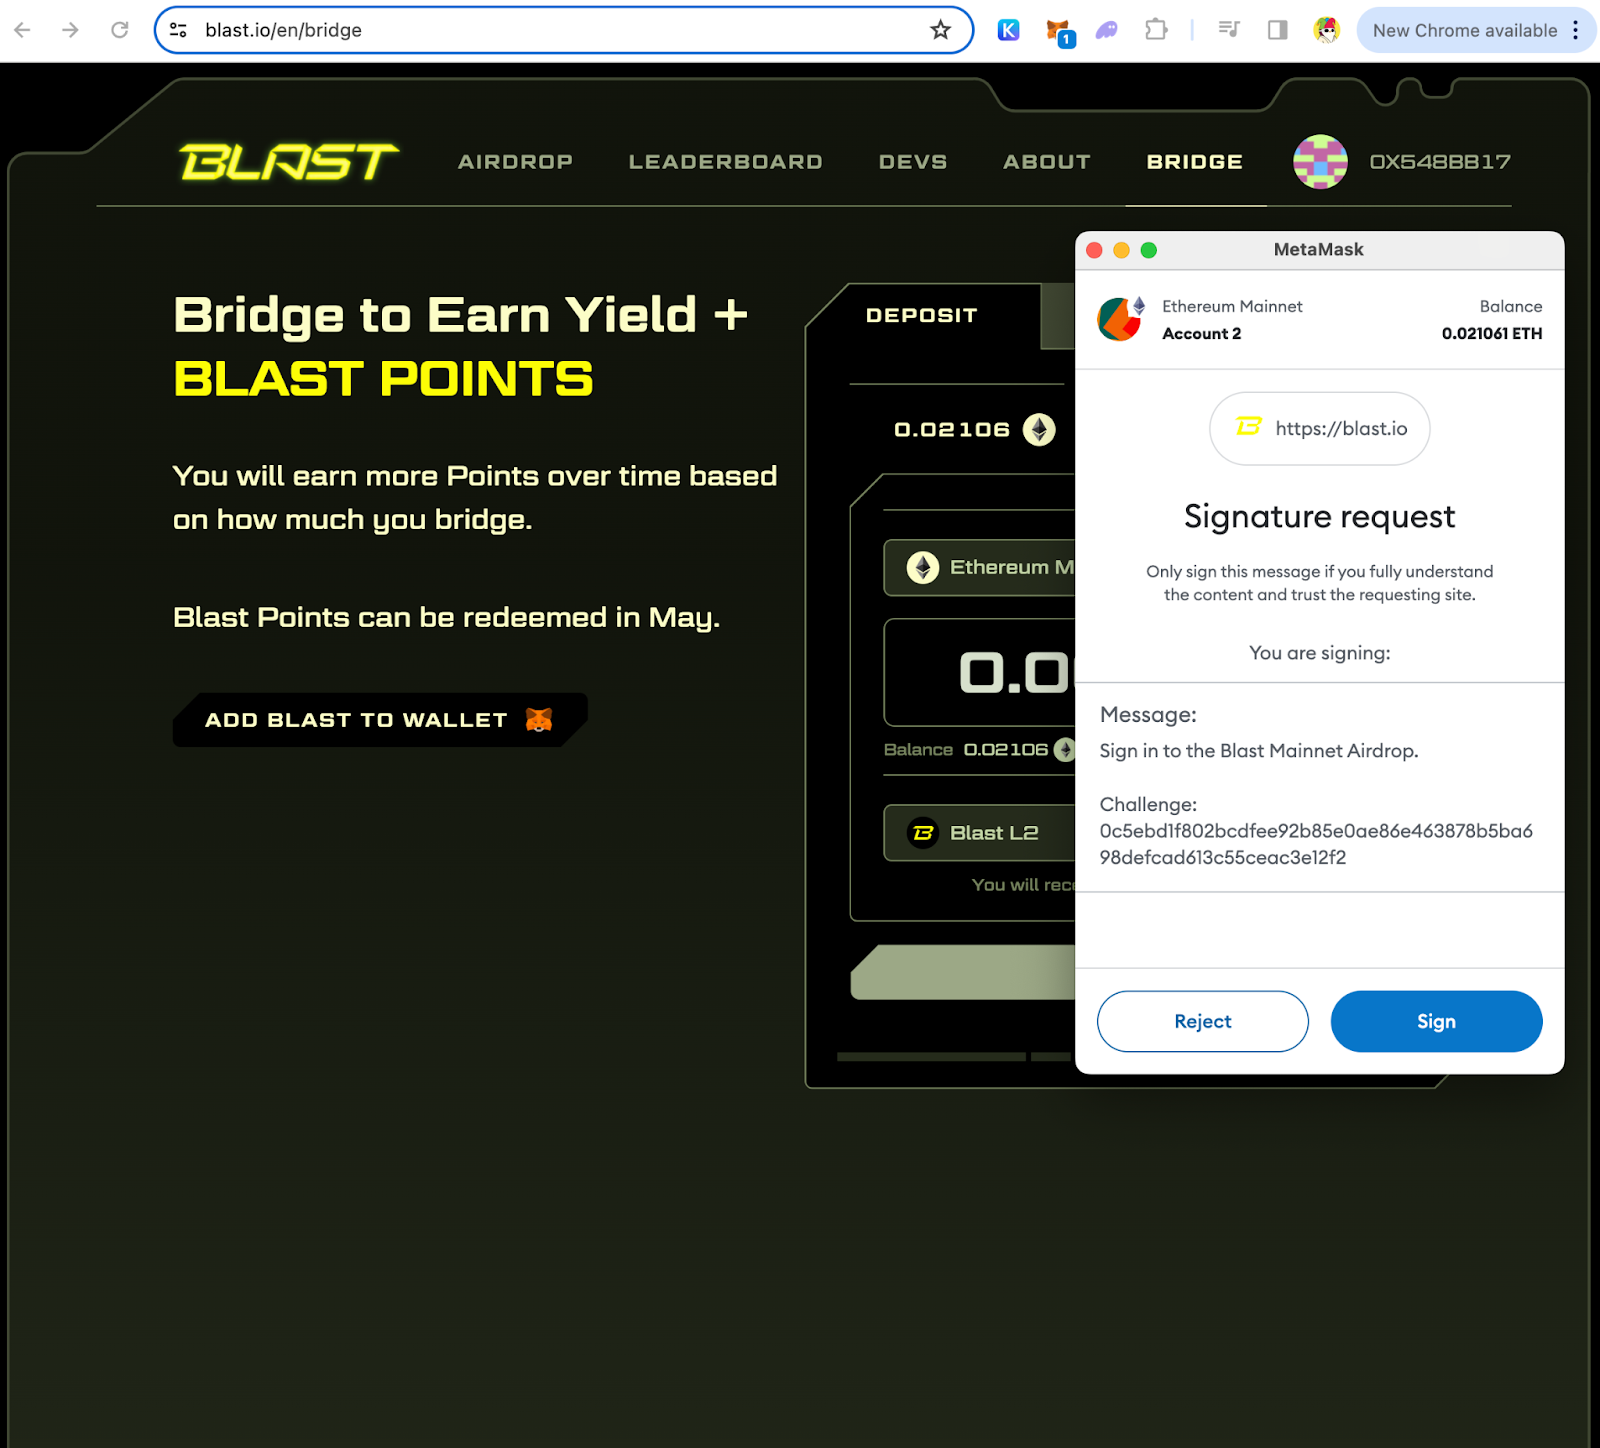
- Sign to allow wallet interaction on Blast.
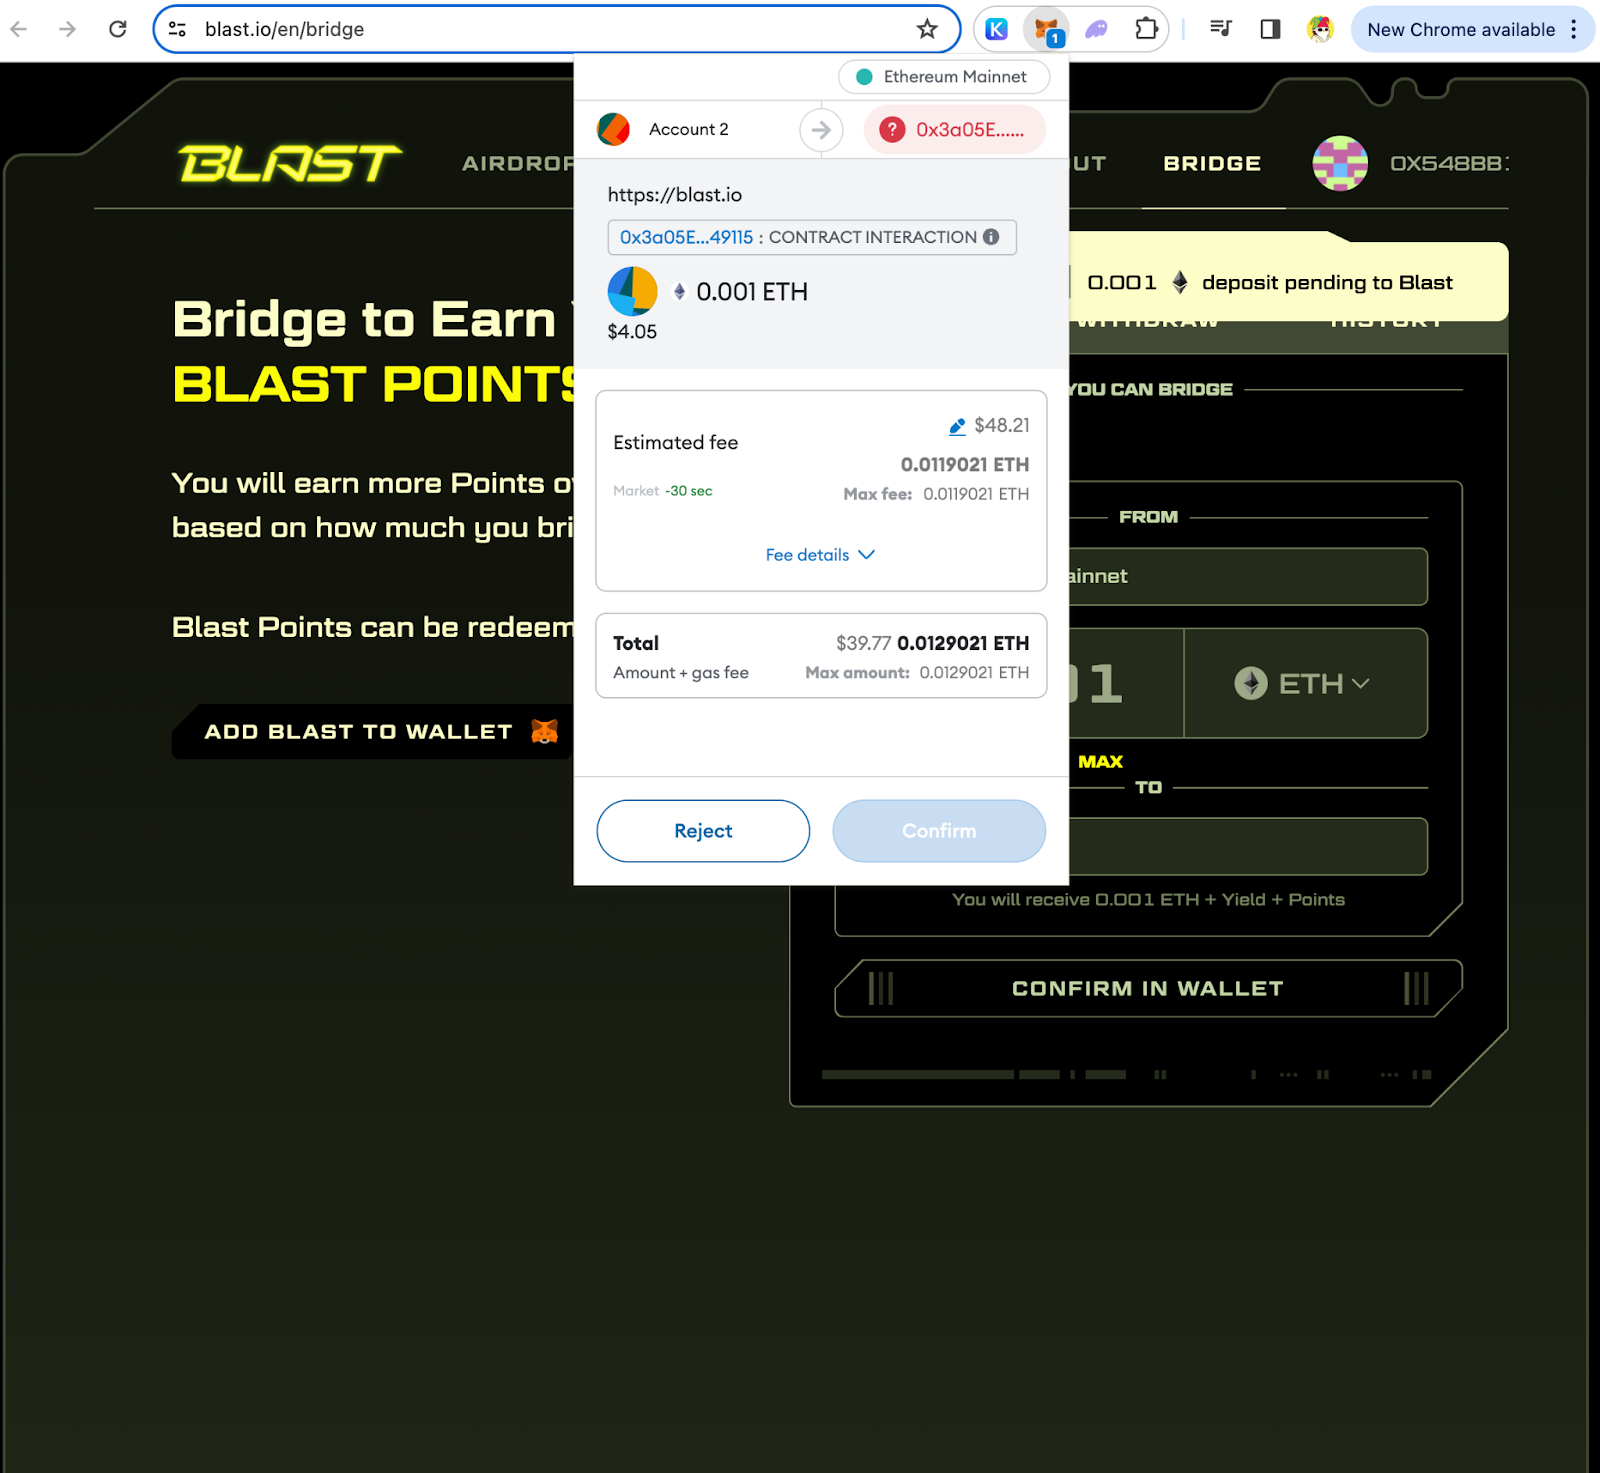
- On the ‘Deposit” Tab, add the amount of asset you wish to bridge to. Click “Submit” to confirm.
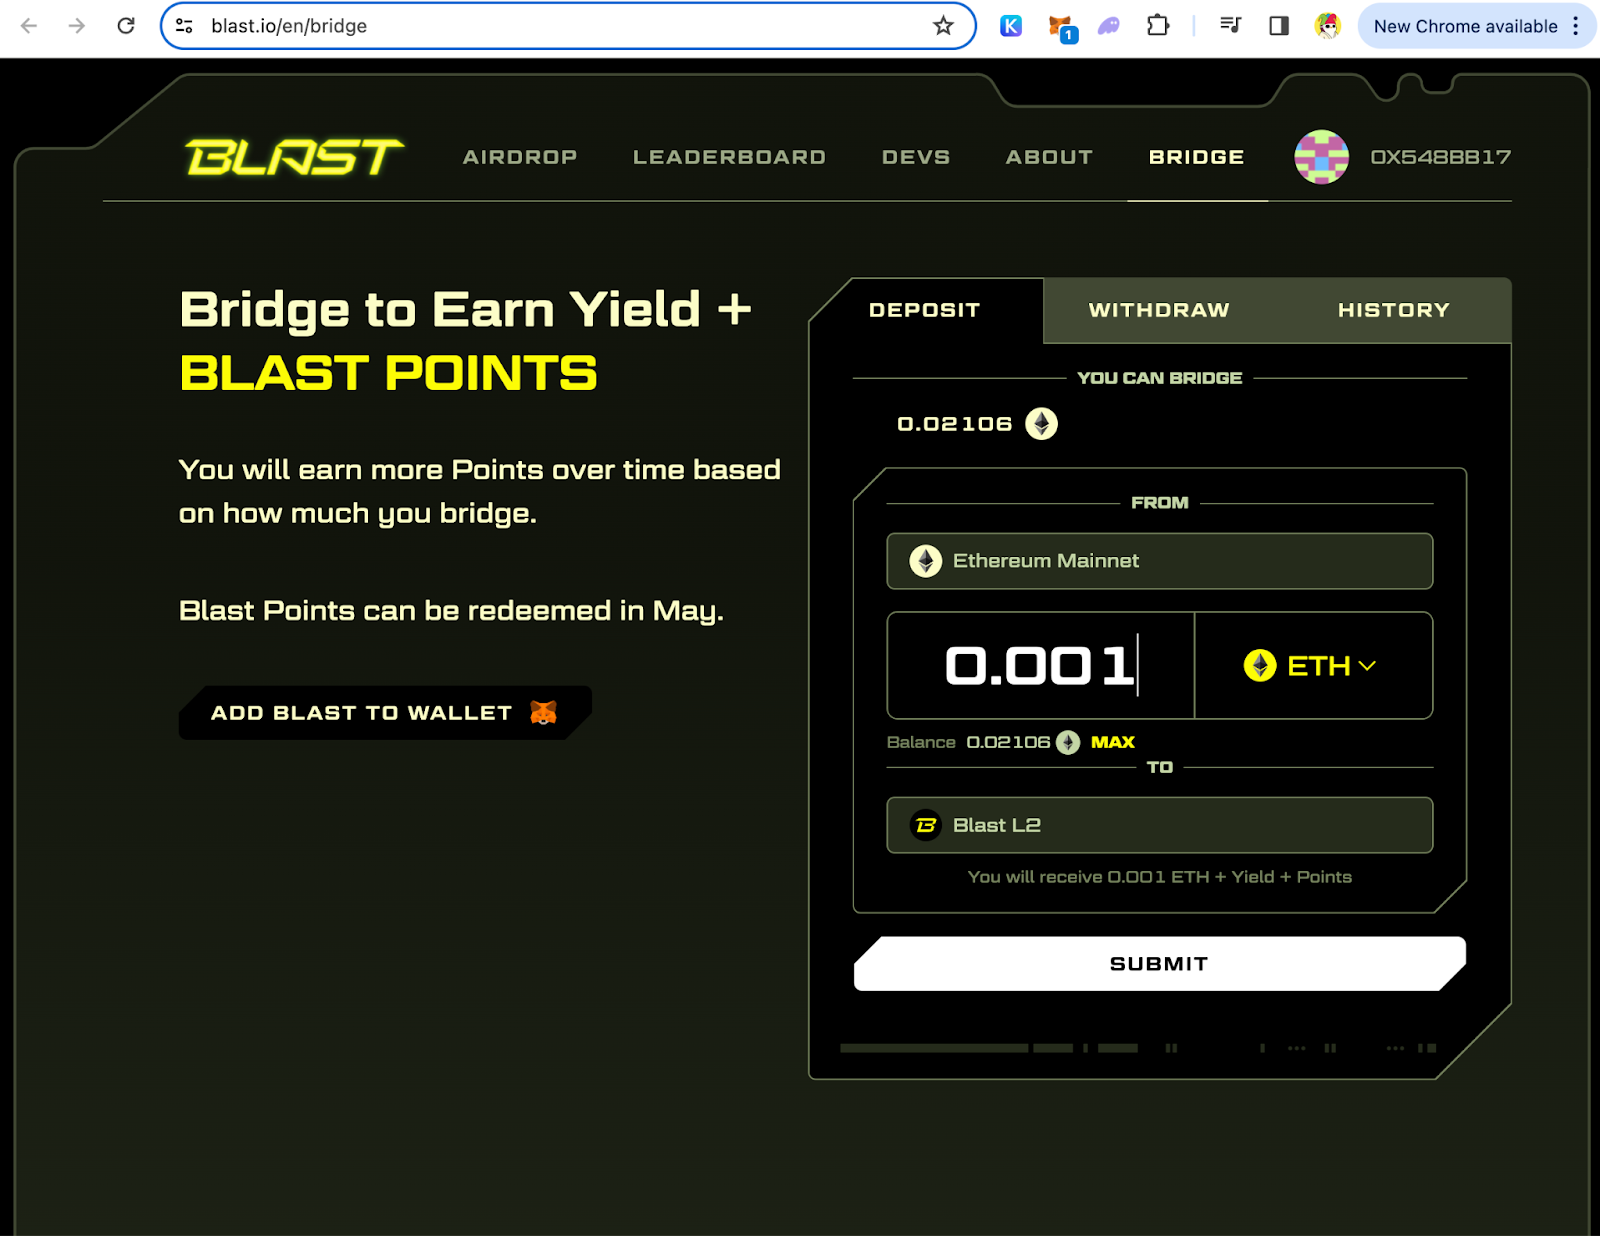
- Confirm the transaction on the wallet.
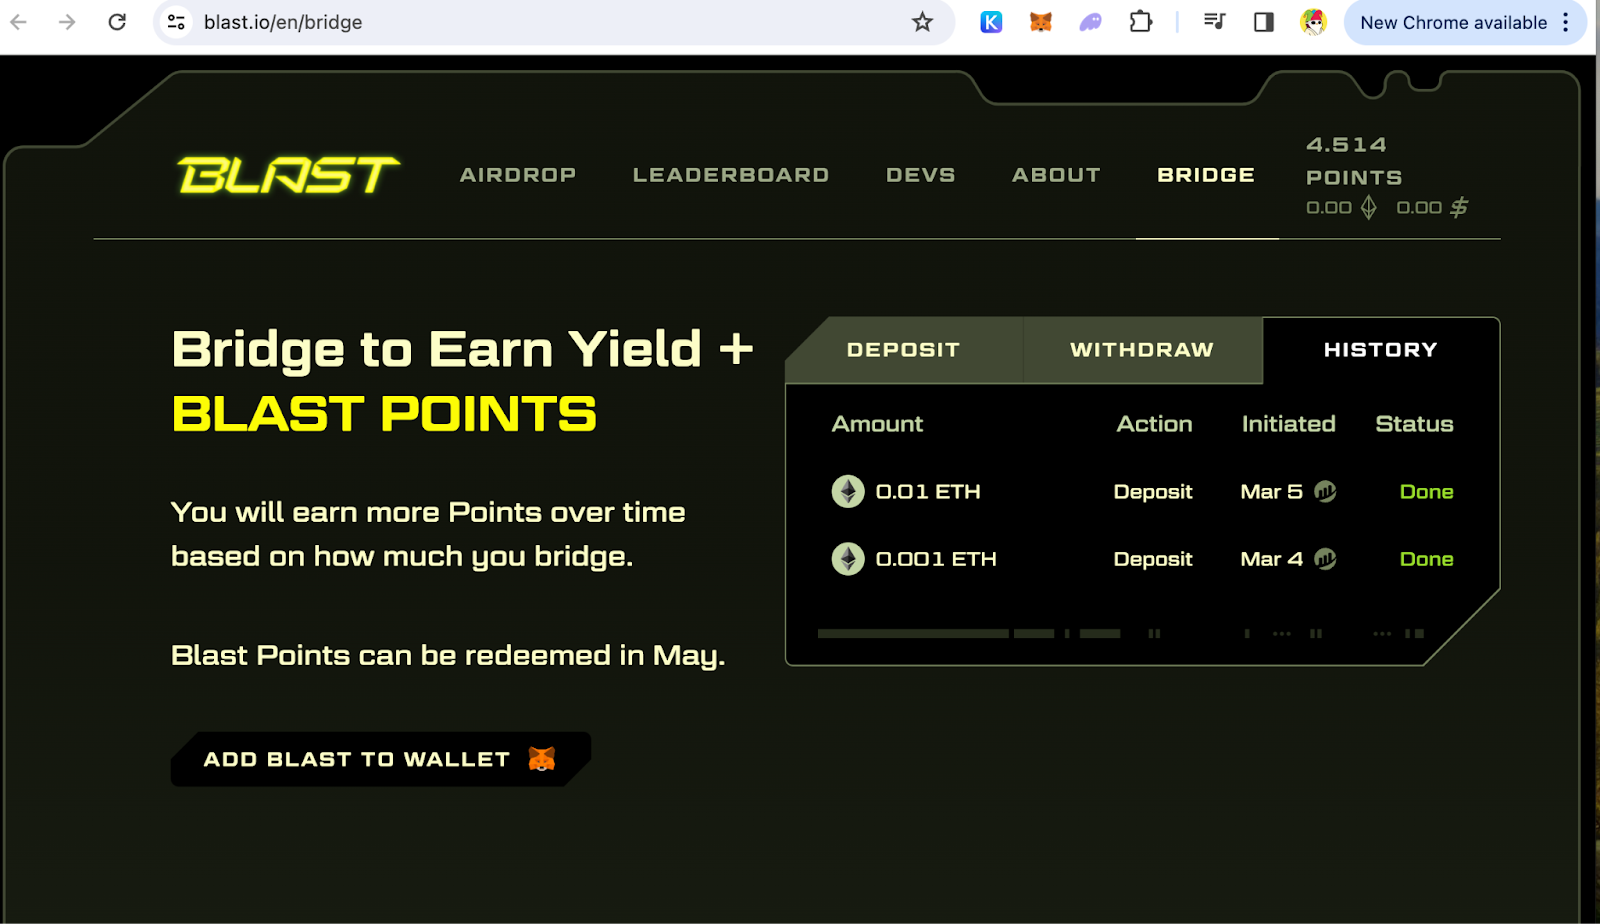
- Wait for the bridging to be completed. Check your wallet balance. Your bidging history is on the “History” tab.
Swap on Blast via Sushi
Now that you have some ether on your wallet, let’s get stated on swapping.
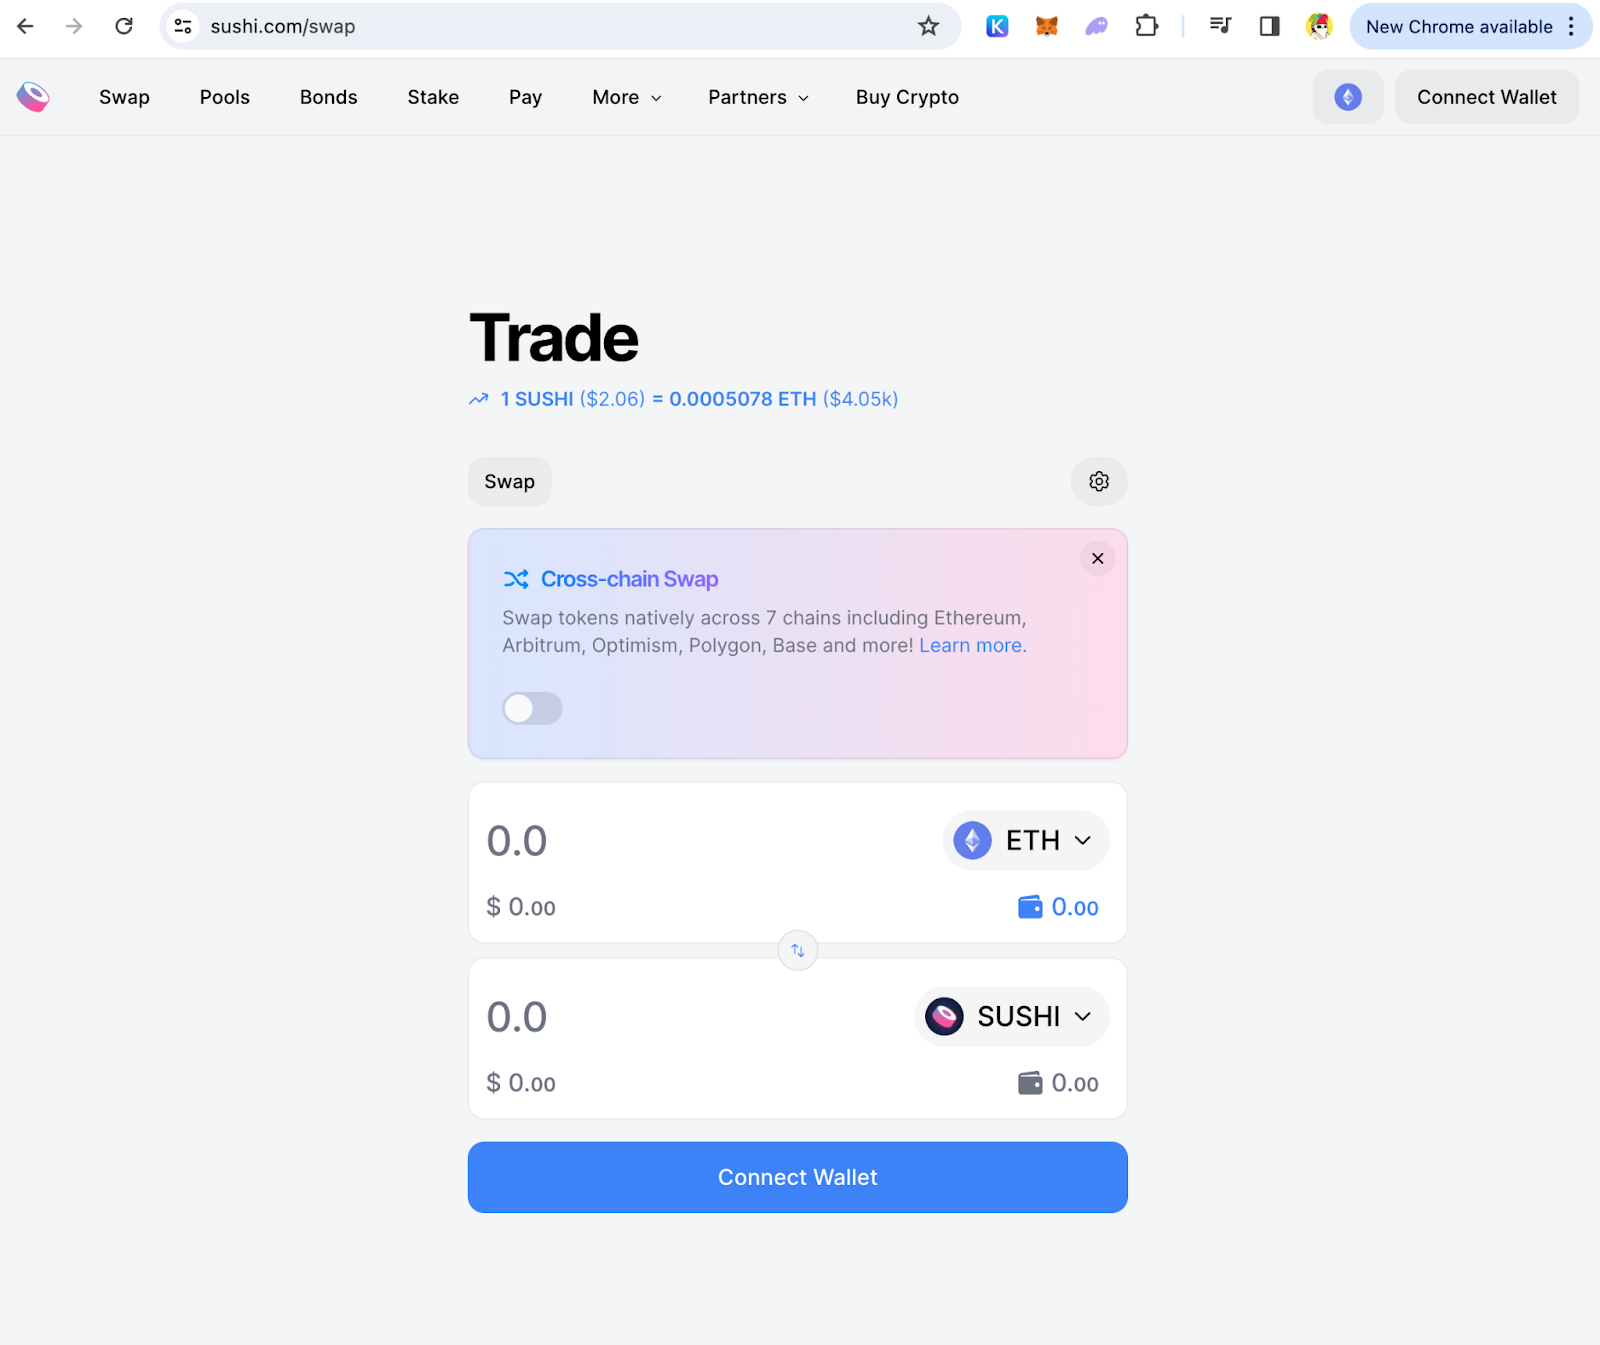
- Visit the Sushi Website
Navigate to the Sushi interface.
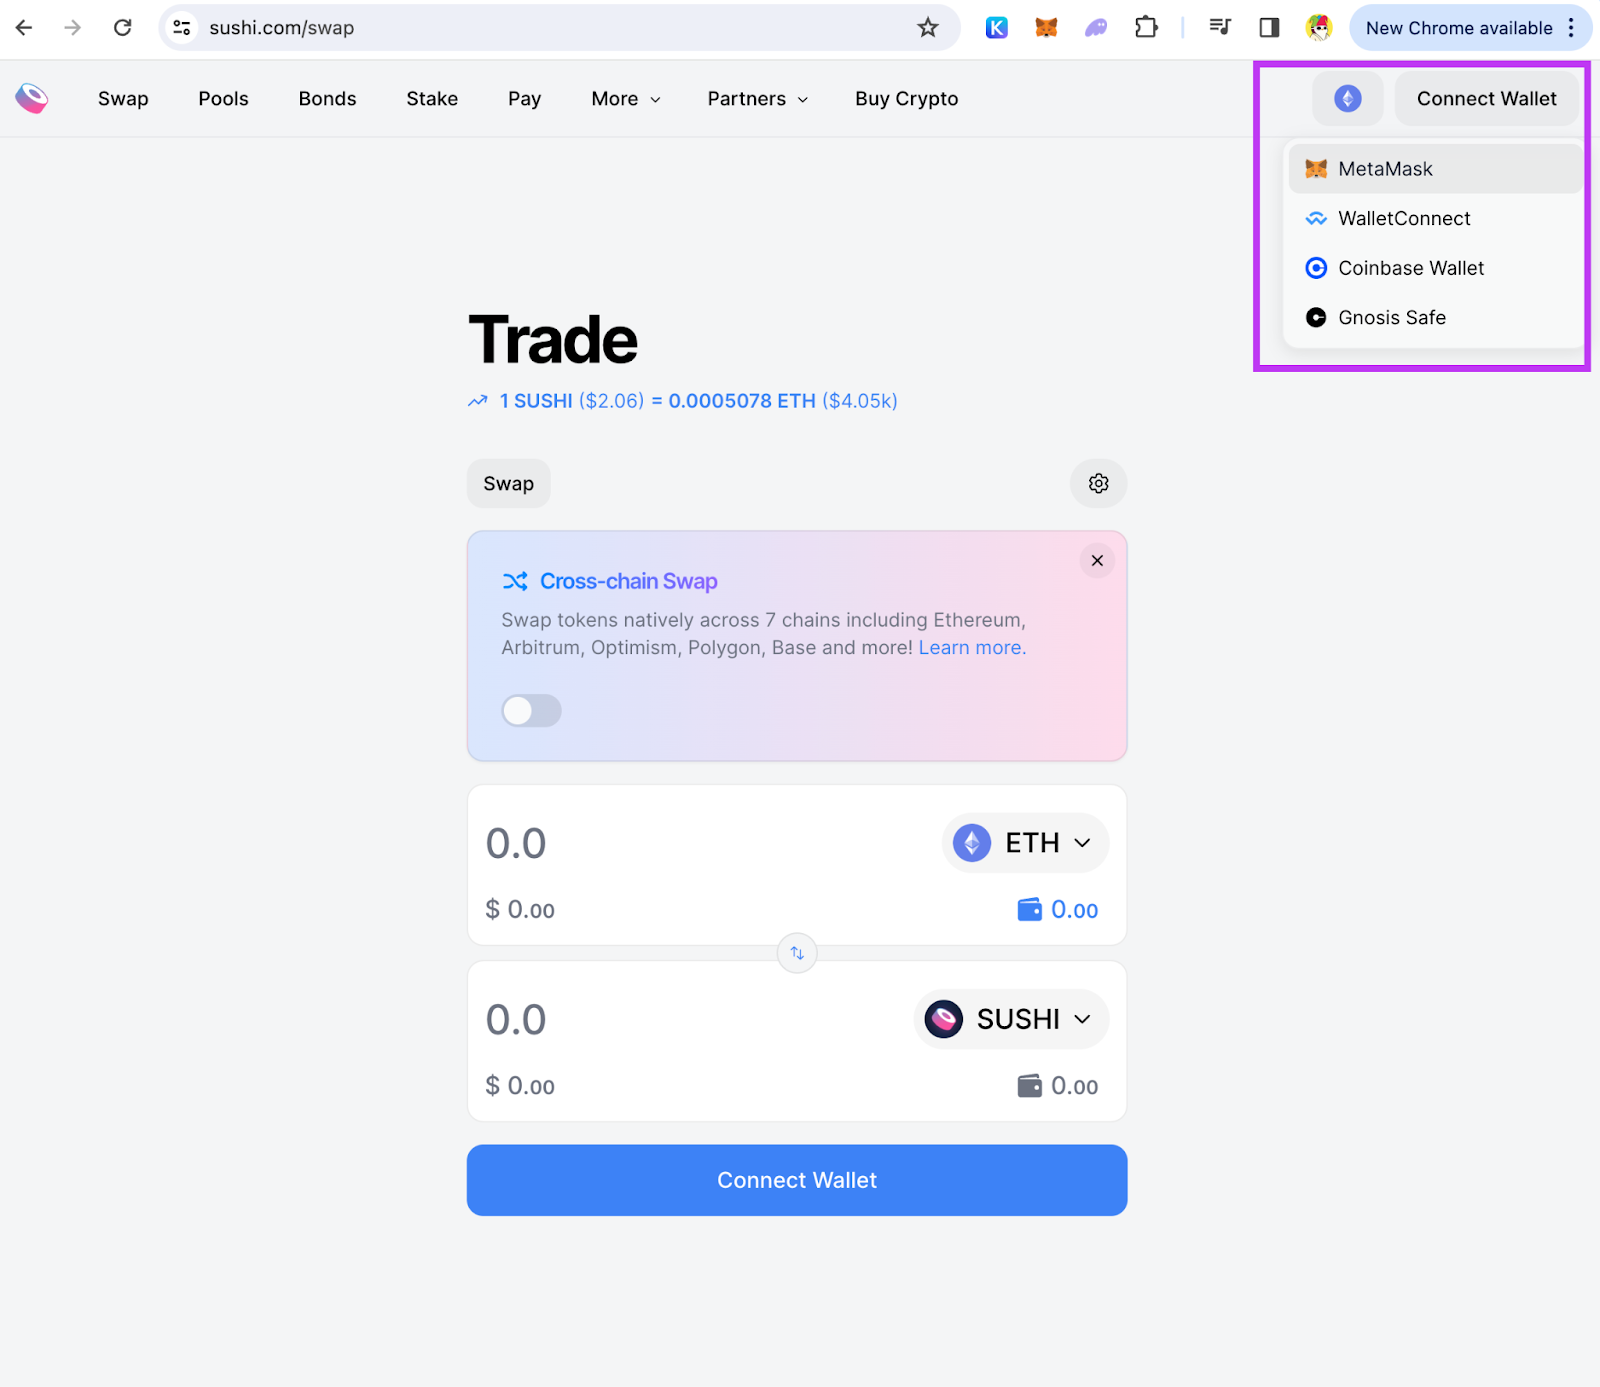
- Connect Wallet
Use a compatible wallet, such as MetaMask, and connect by following the prompt.
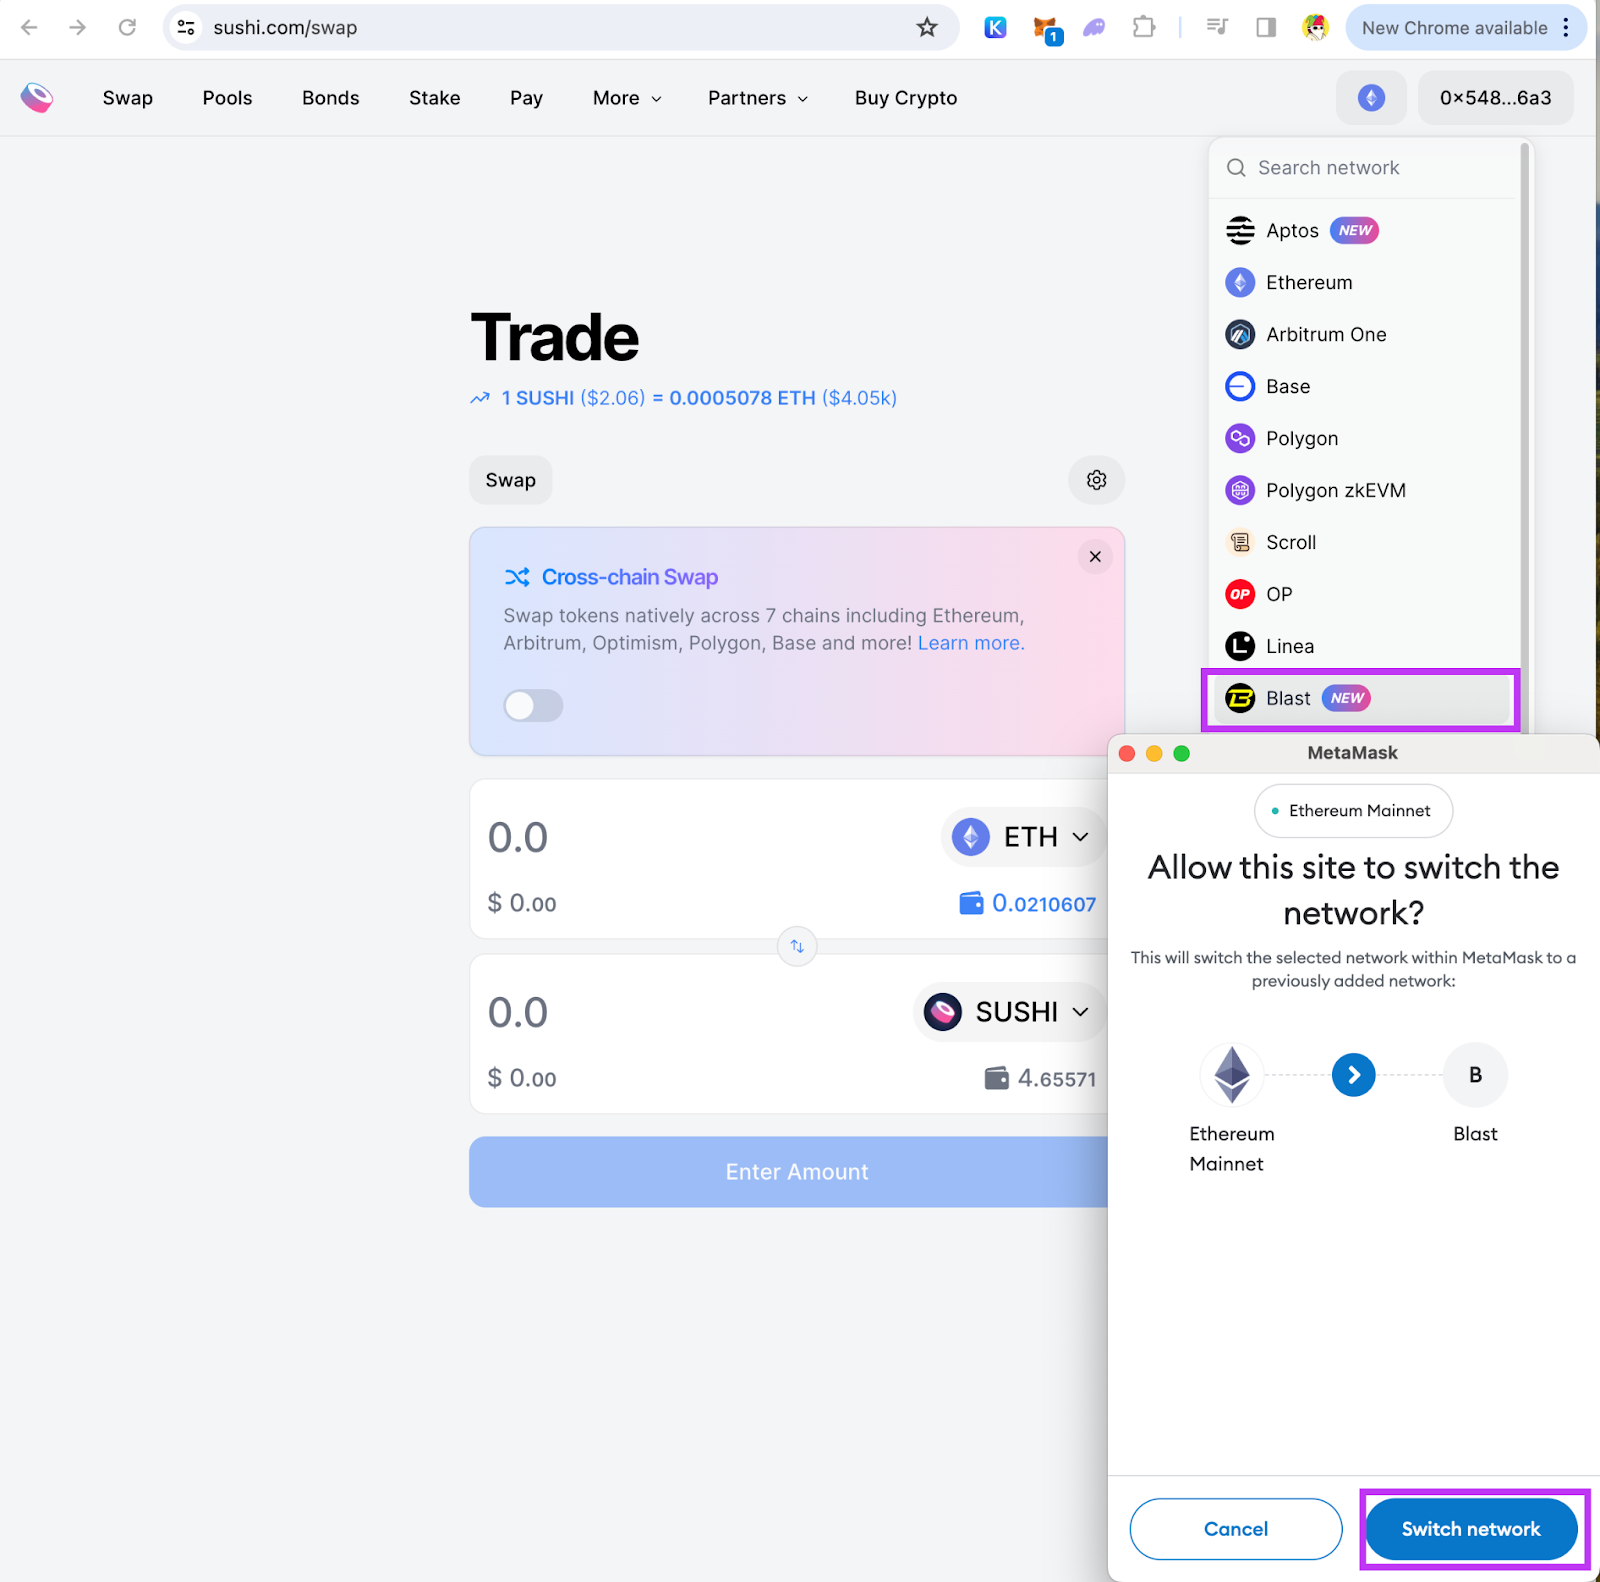
- Change "Network" to Blast
In the network selection area, switch from the default or current network to Blast. Ensure your wallet is connected.

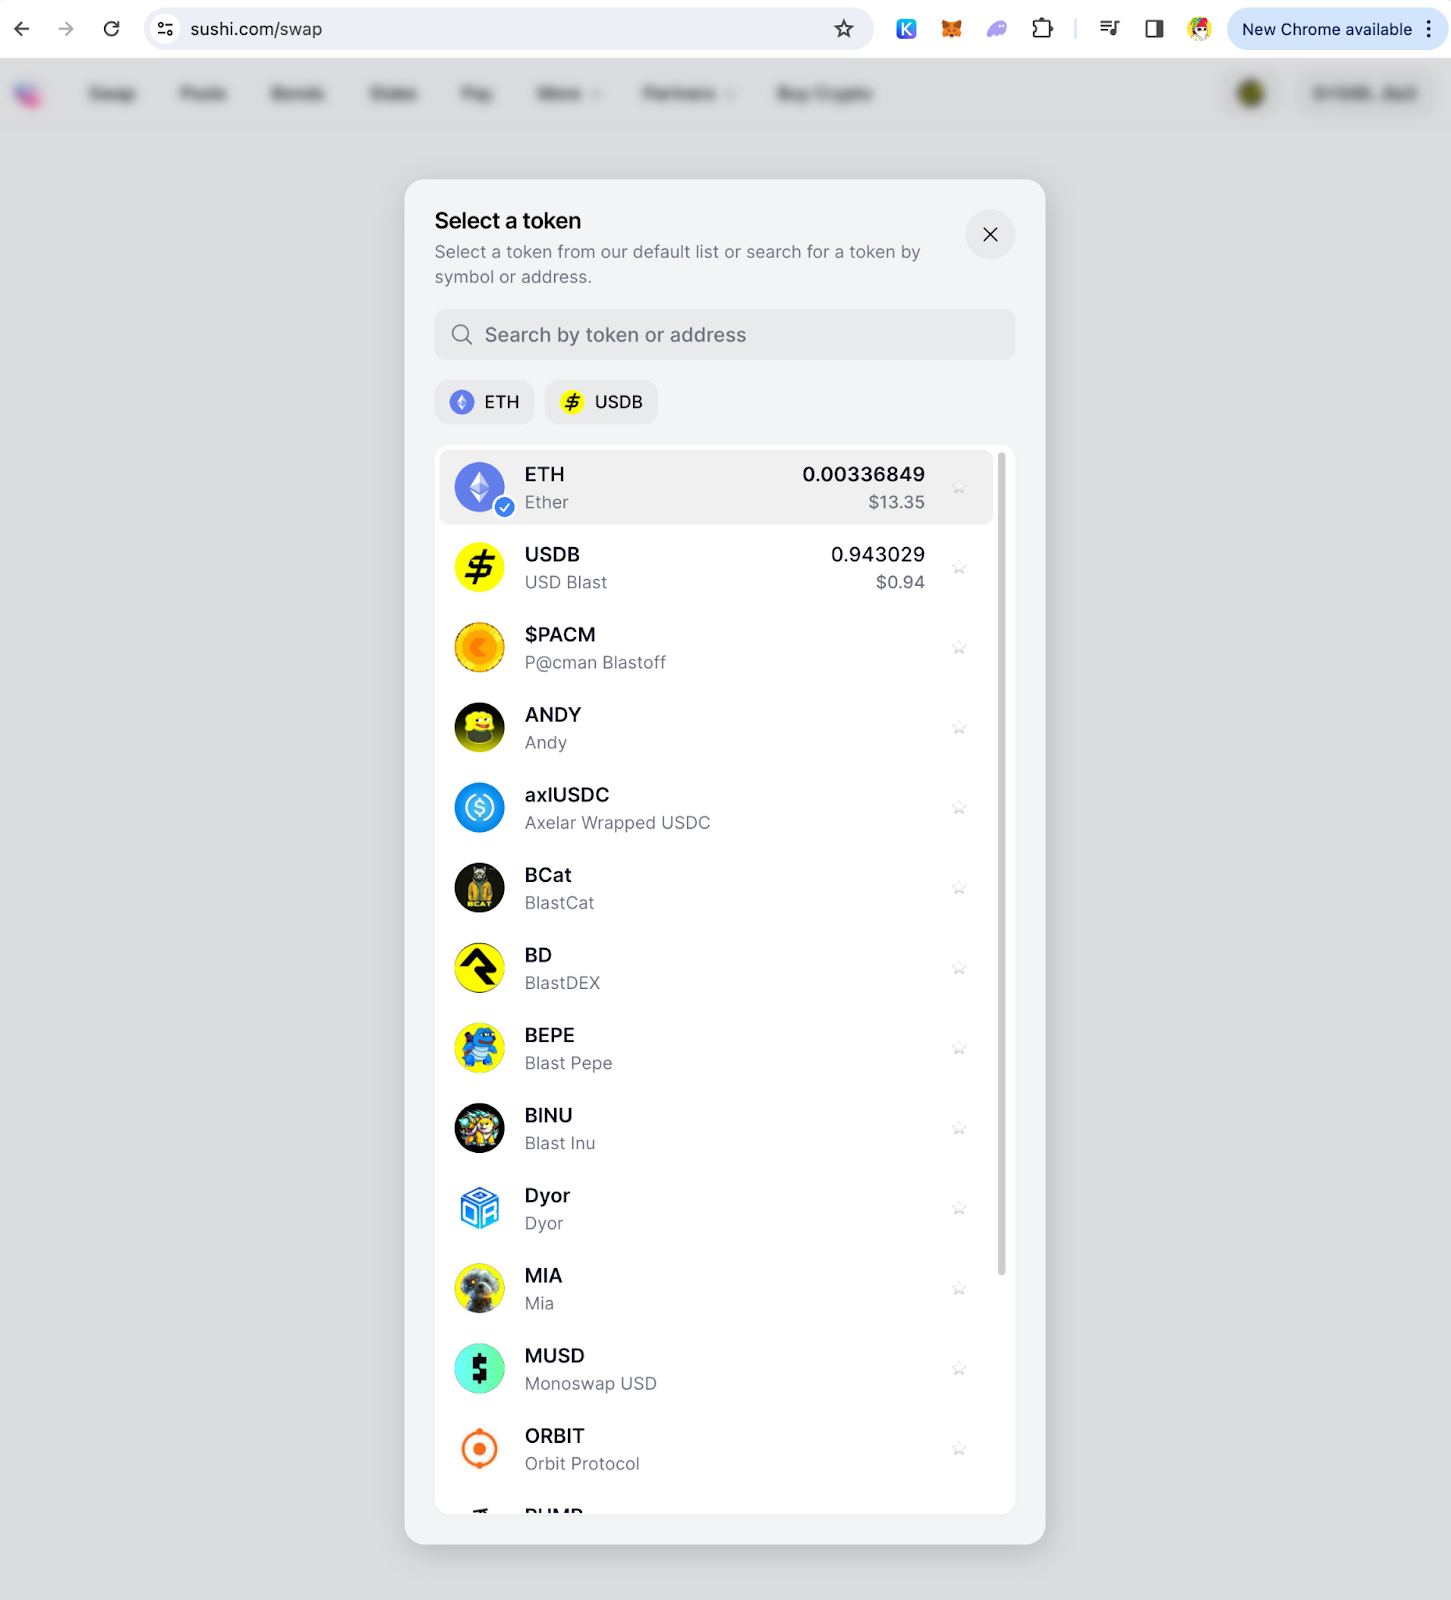
- Select Tokens to Swap
Choose the tokens you wish to swap. You can click on the token list to see more options in the dropdown menu. Choose the tokens you want to swap from and to. Then click “Swap”.
- Enter Swap Amount
Input the number of tokens you want to swap.
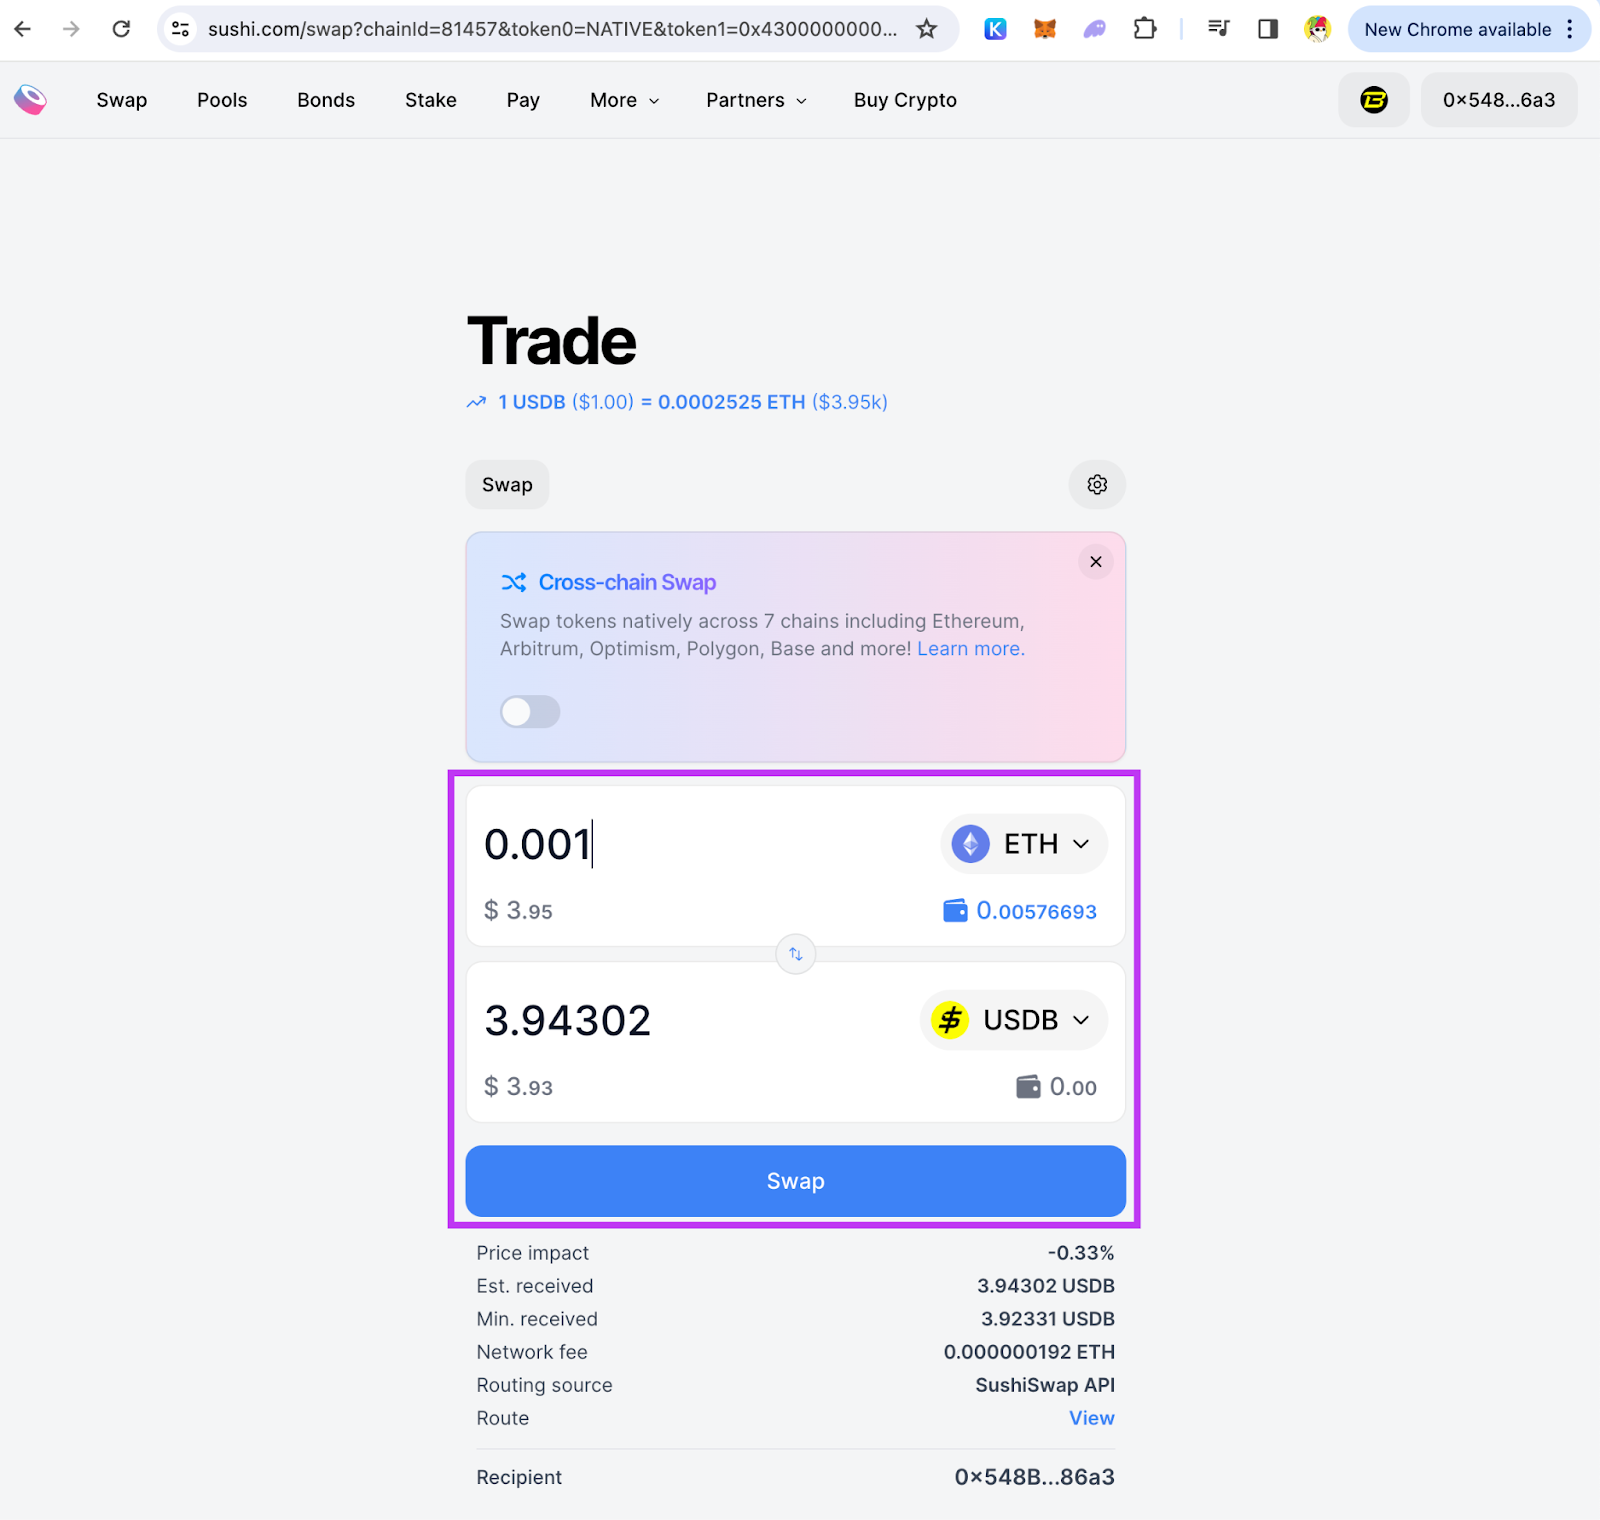
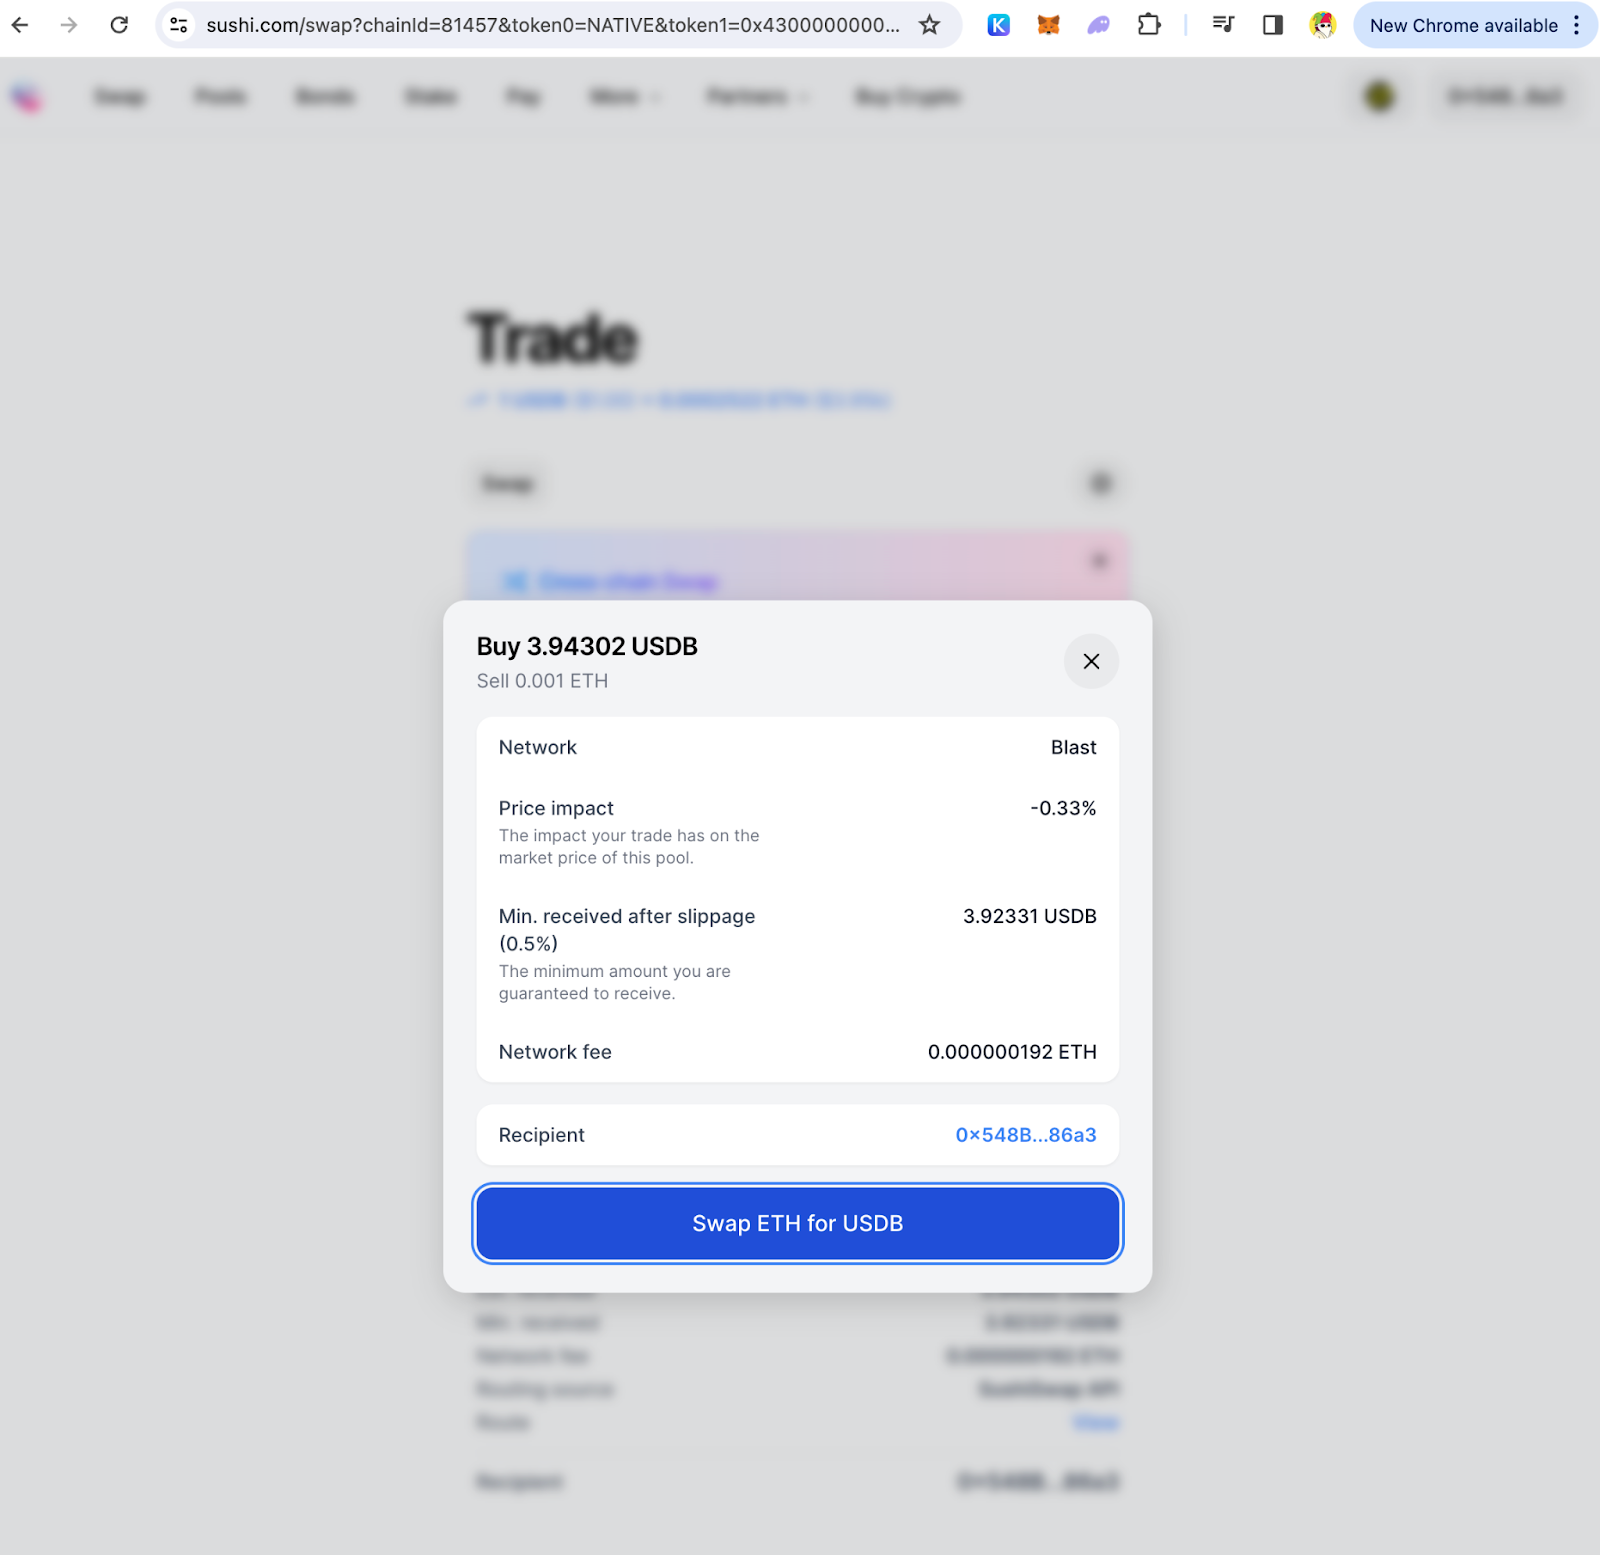
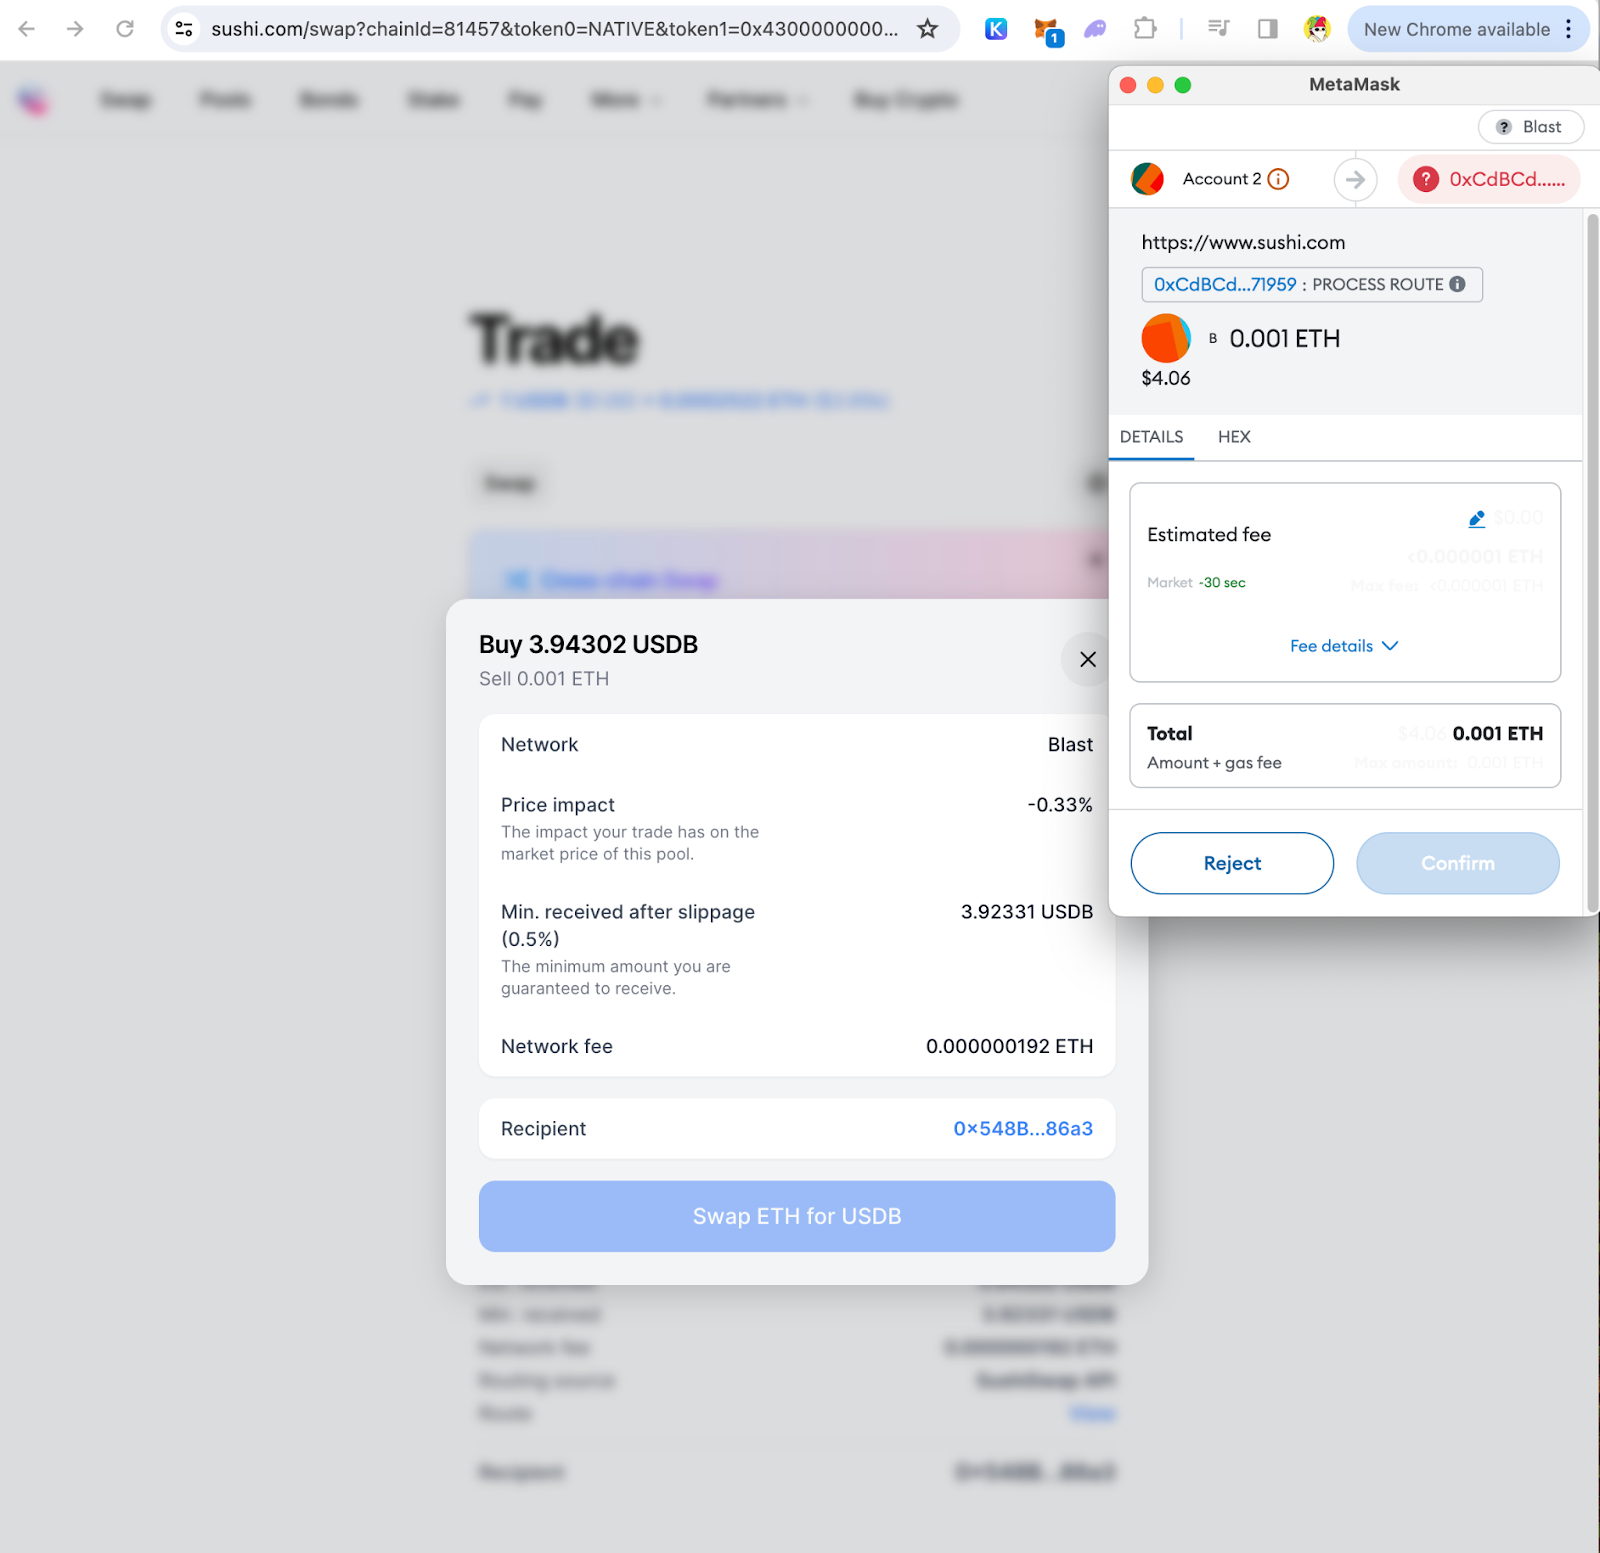
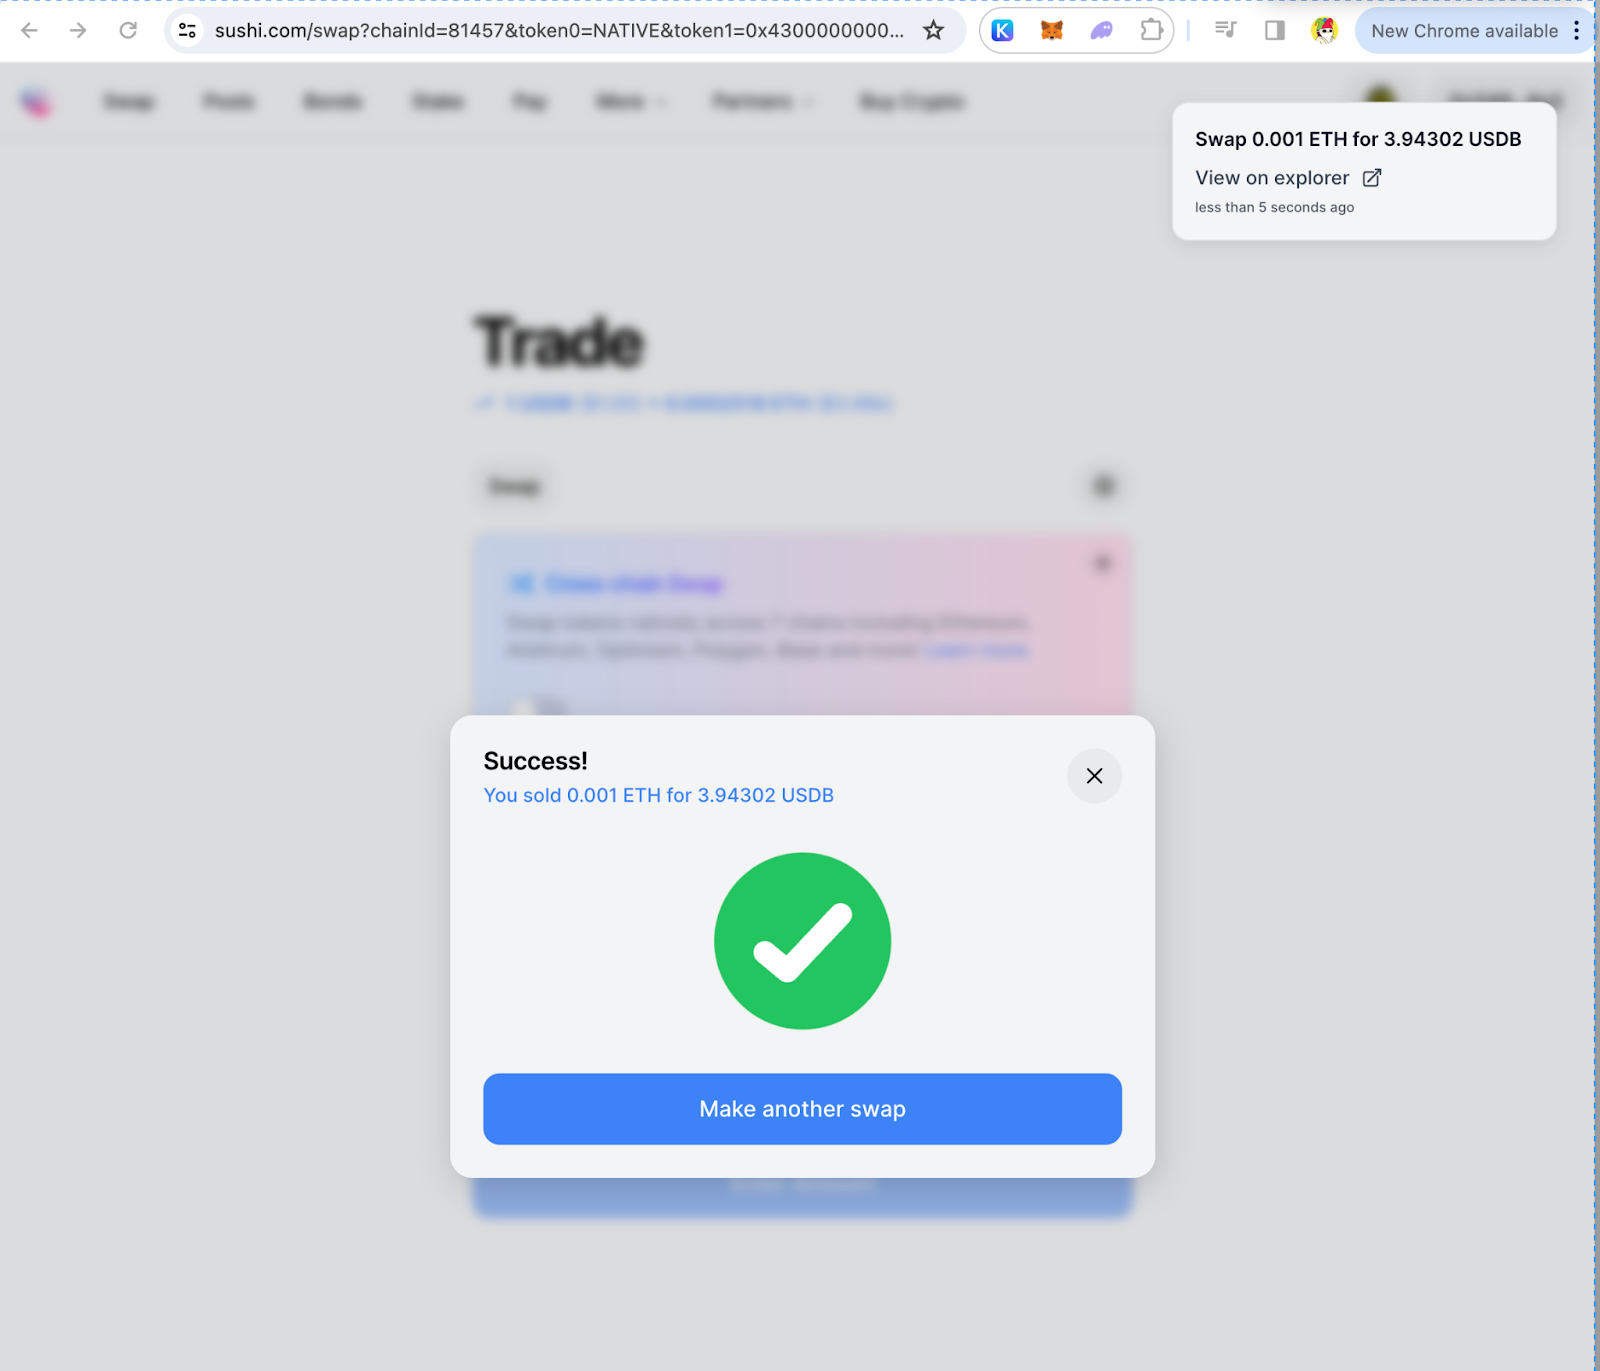
- Execute the Swap
Click “Swap” to initiate the transaction, then click “Confirm” in your wallet interface to execute the swap. Upon successful transaction, you've effectively swapped tokens on Blast.
LP on Blast via Sushi (v3)
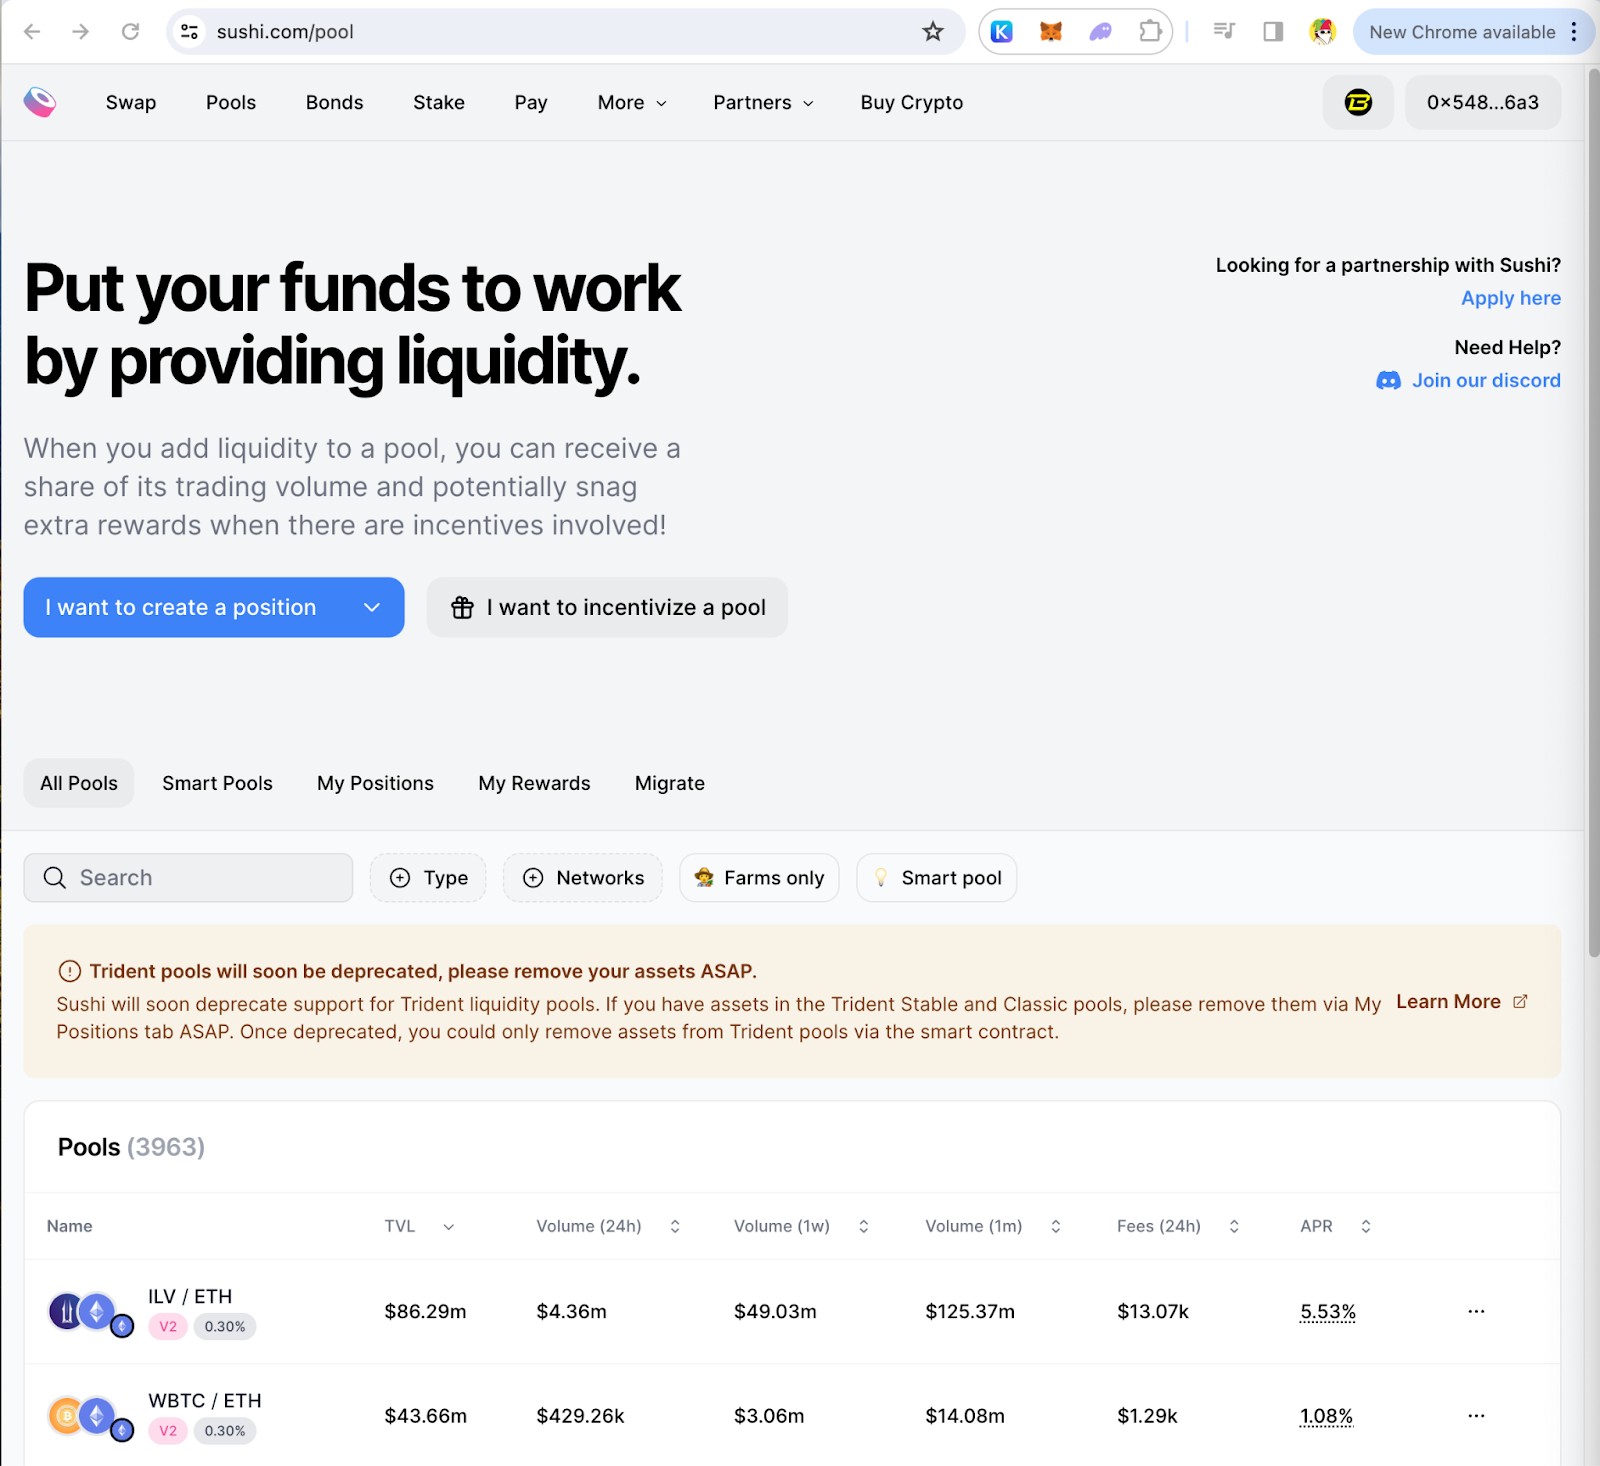
- Visit the Sushi Pool UI
Connect the wallet and change the network settings to Blast if you haven’t already done so.
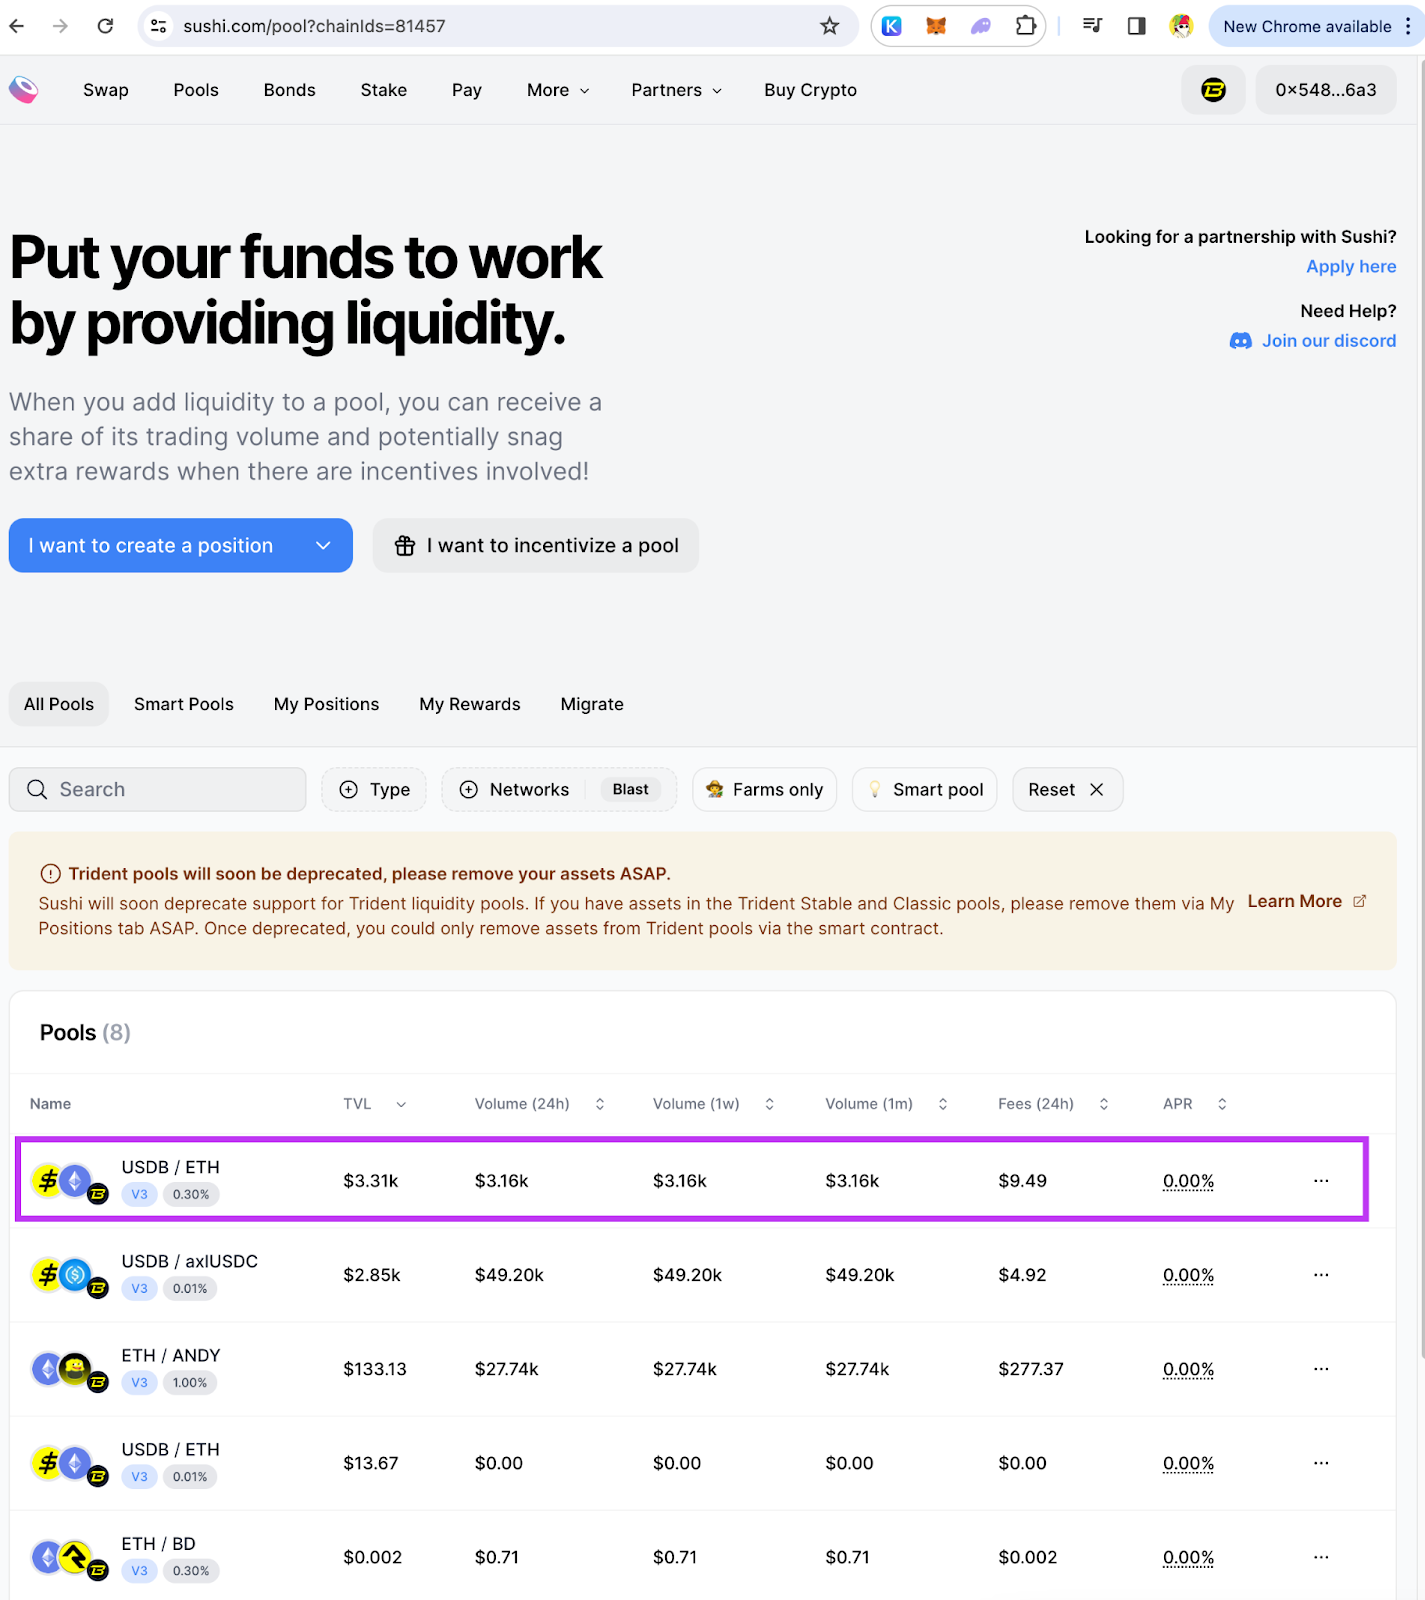
- Select Network

- Select a Pool
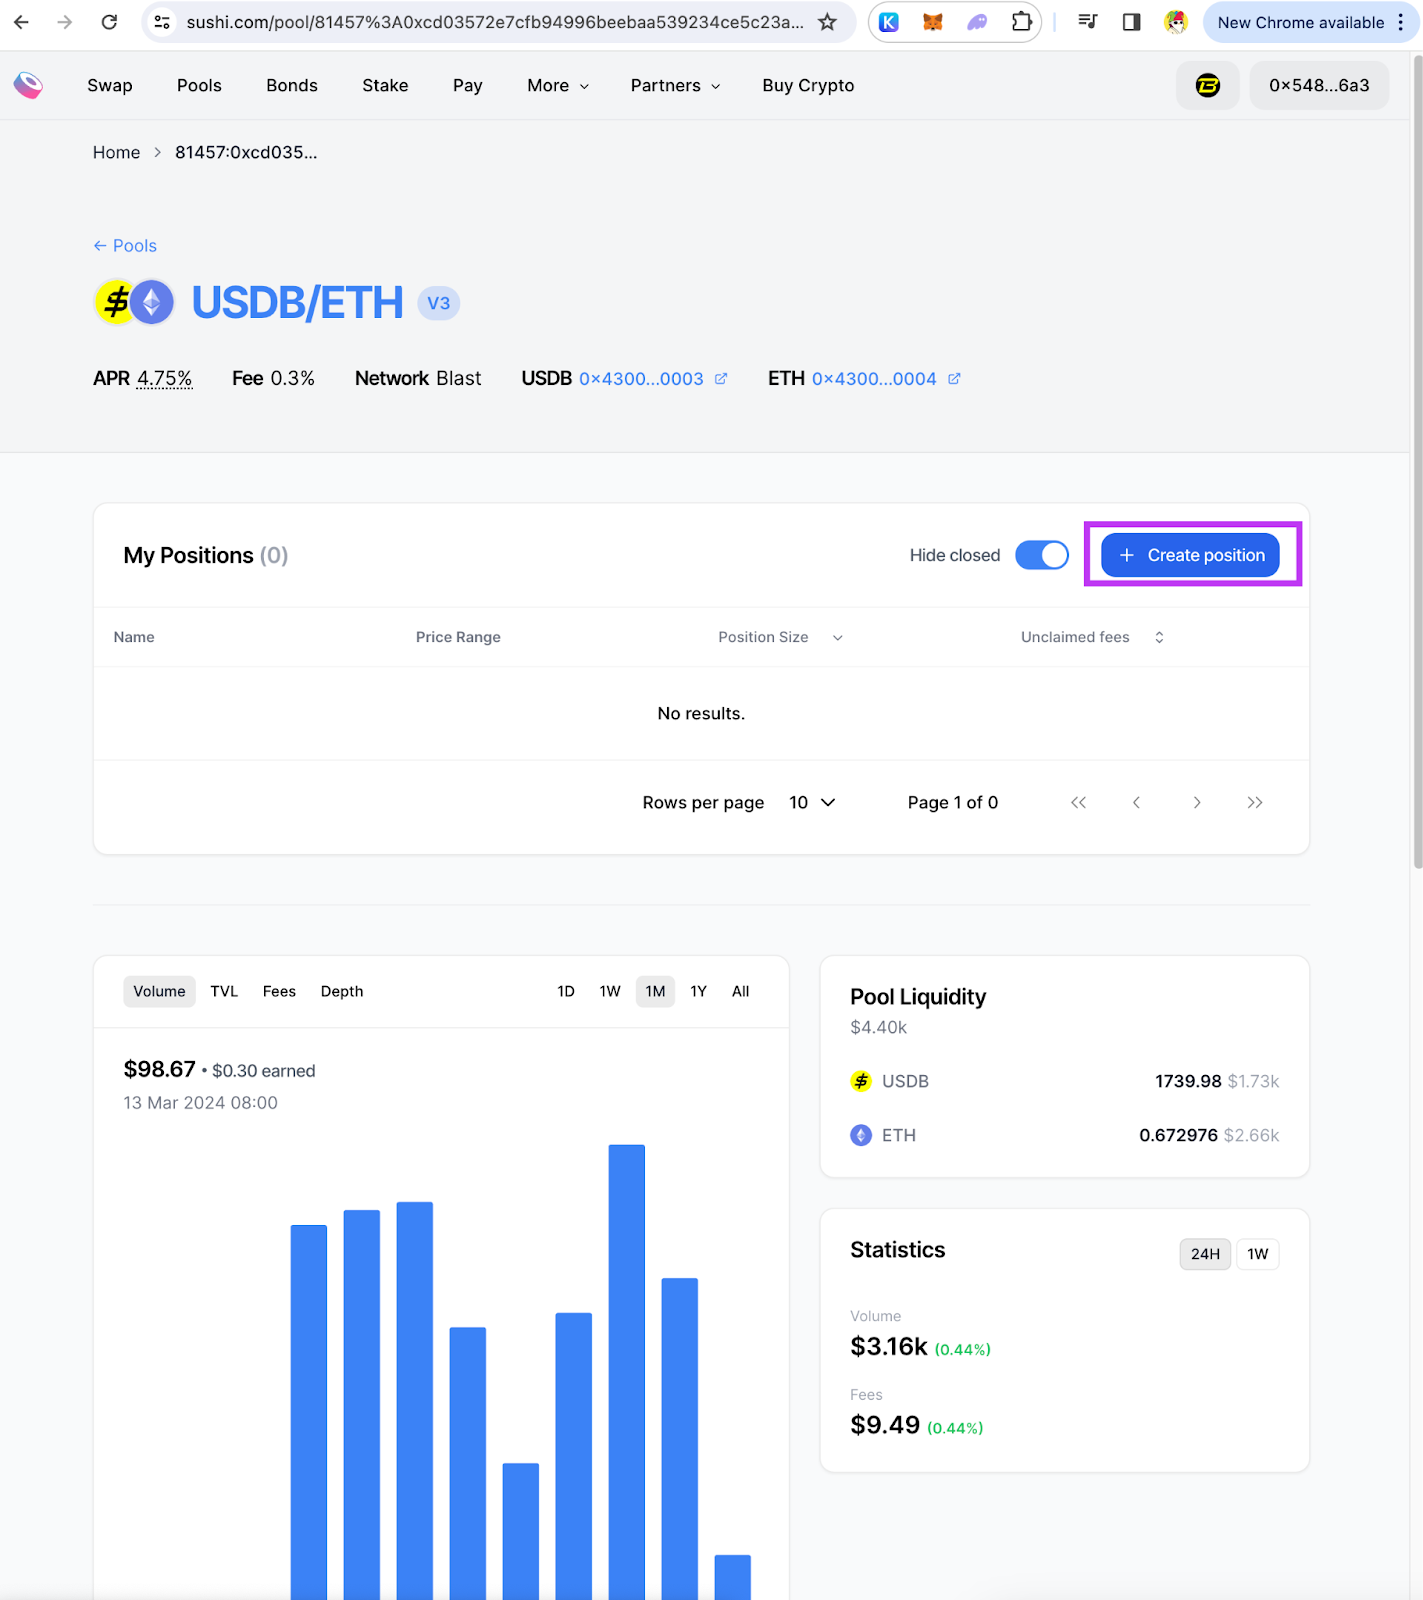
Choose a liquidity pool you're interested in LP. In this example, we will choose USDB/ETH.
- Create a position
Click "Create a position" to start LPing.
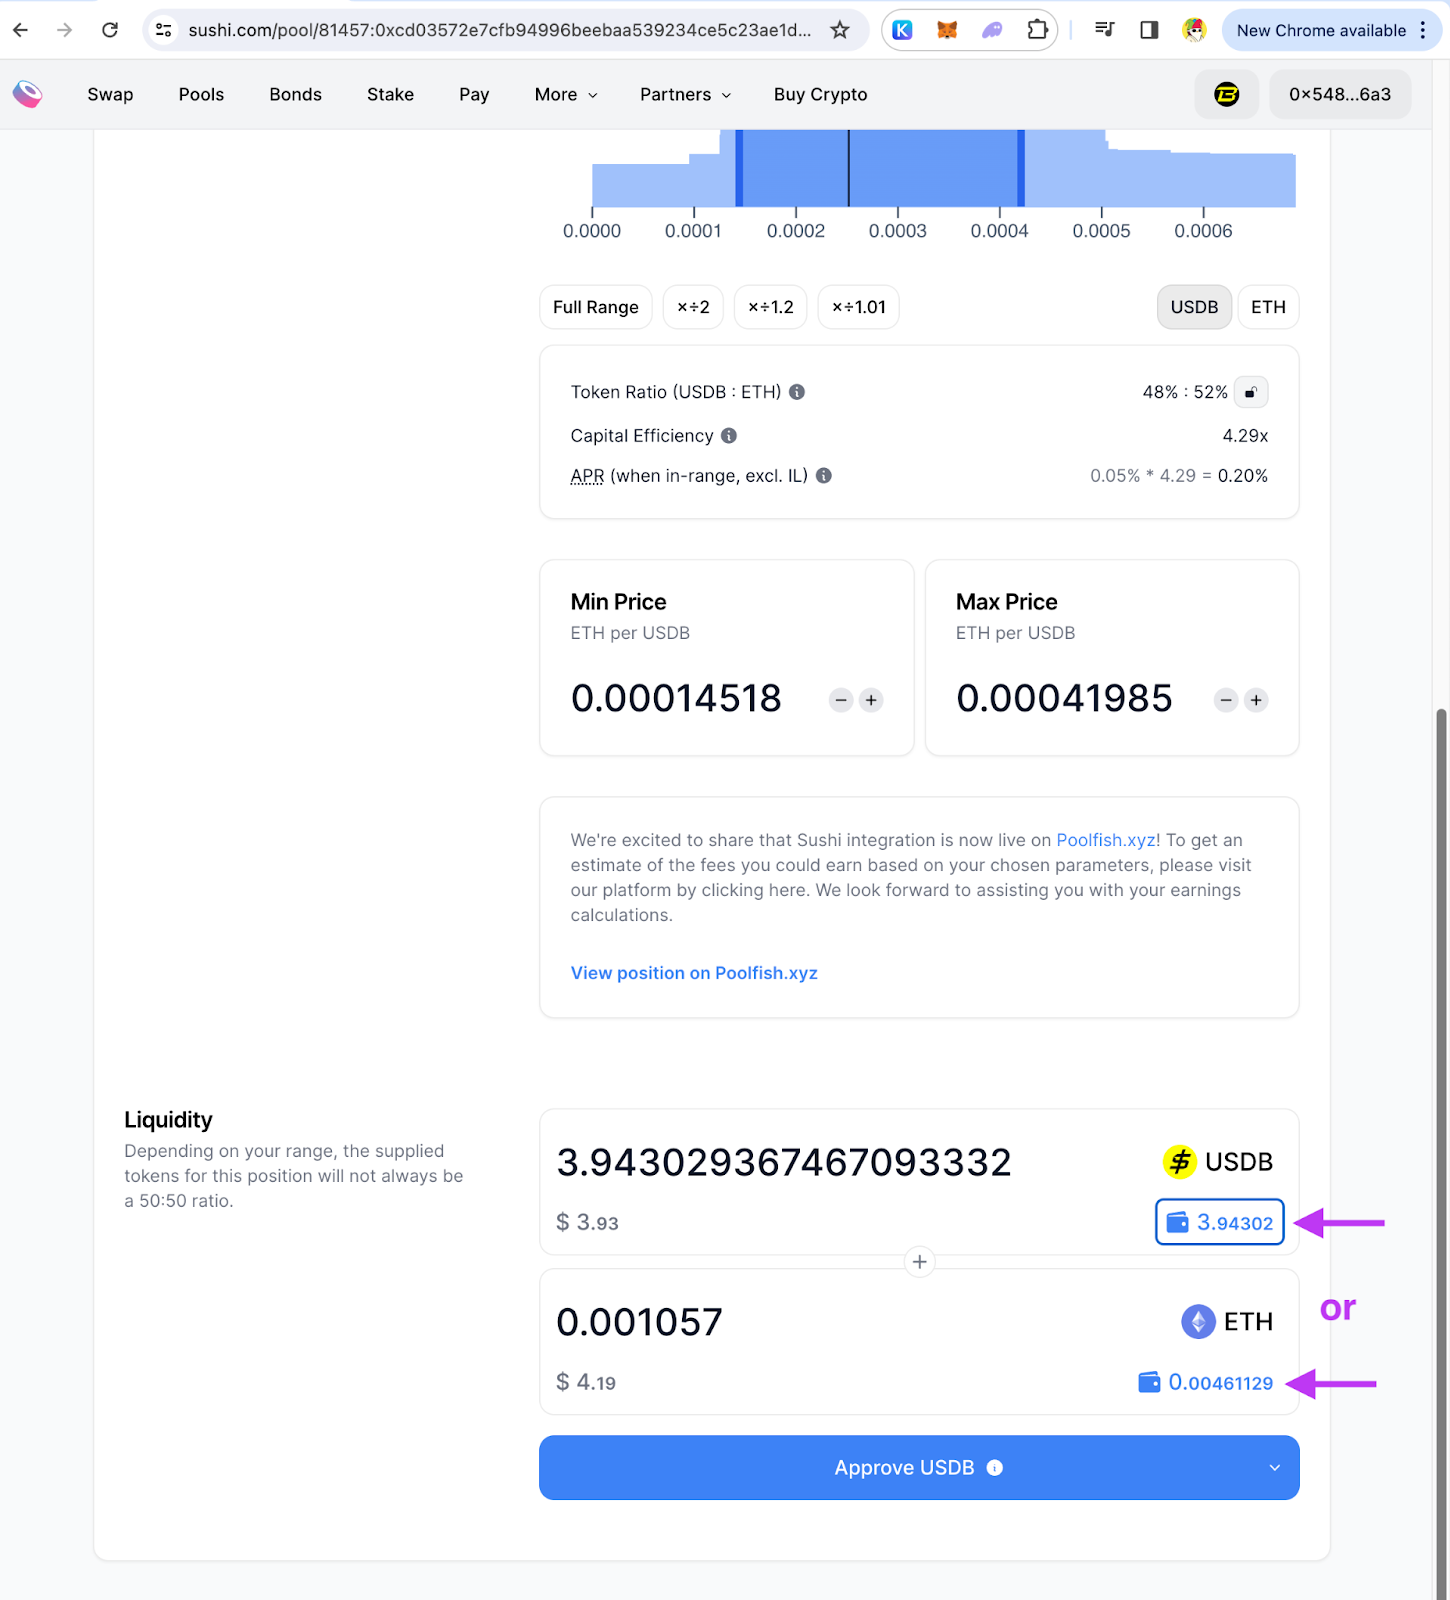
- Select Price Range
Determine the price range within which you're willing to provide liquidity. This step is crucial for concentrated liquidity pools. There are 2 ways to do it:
a. You can set the minimum and maximum price by adjusting the price range bar or ;
b. Entering specific values into the designated boxes.
Remember that a narrower price range can result in higher fee collection but also increase the risk of being out of range and not earning any fees. Opting for the full range is equivalent to the classic v2, with no concentrated liquidity.

- Provide Liquidity Amount
Enter the amount for one token in the pair. The protocol will populate the other token. If one token exceeds the amount, try inputting the other one first. Then Click on “Preview”
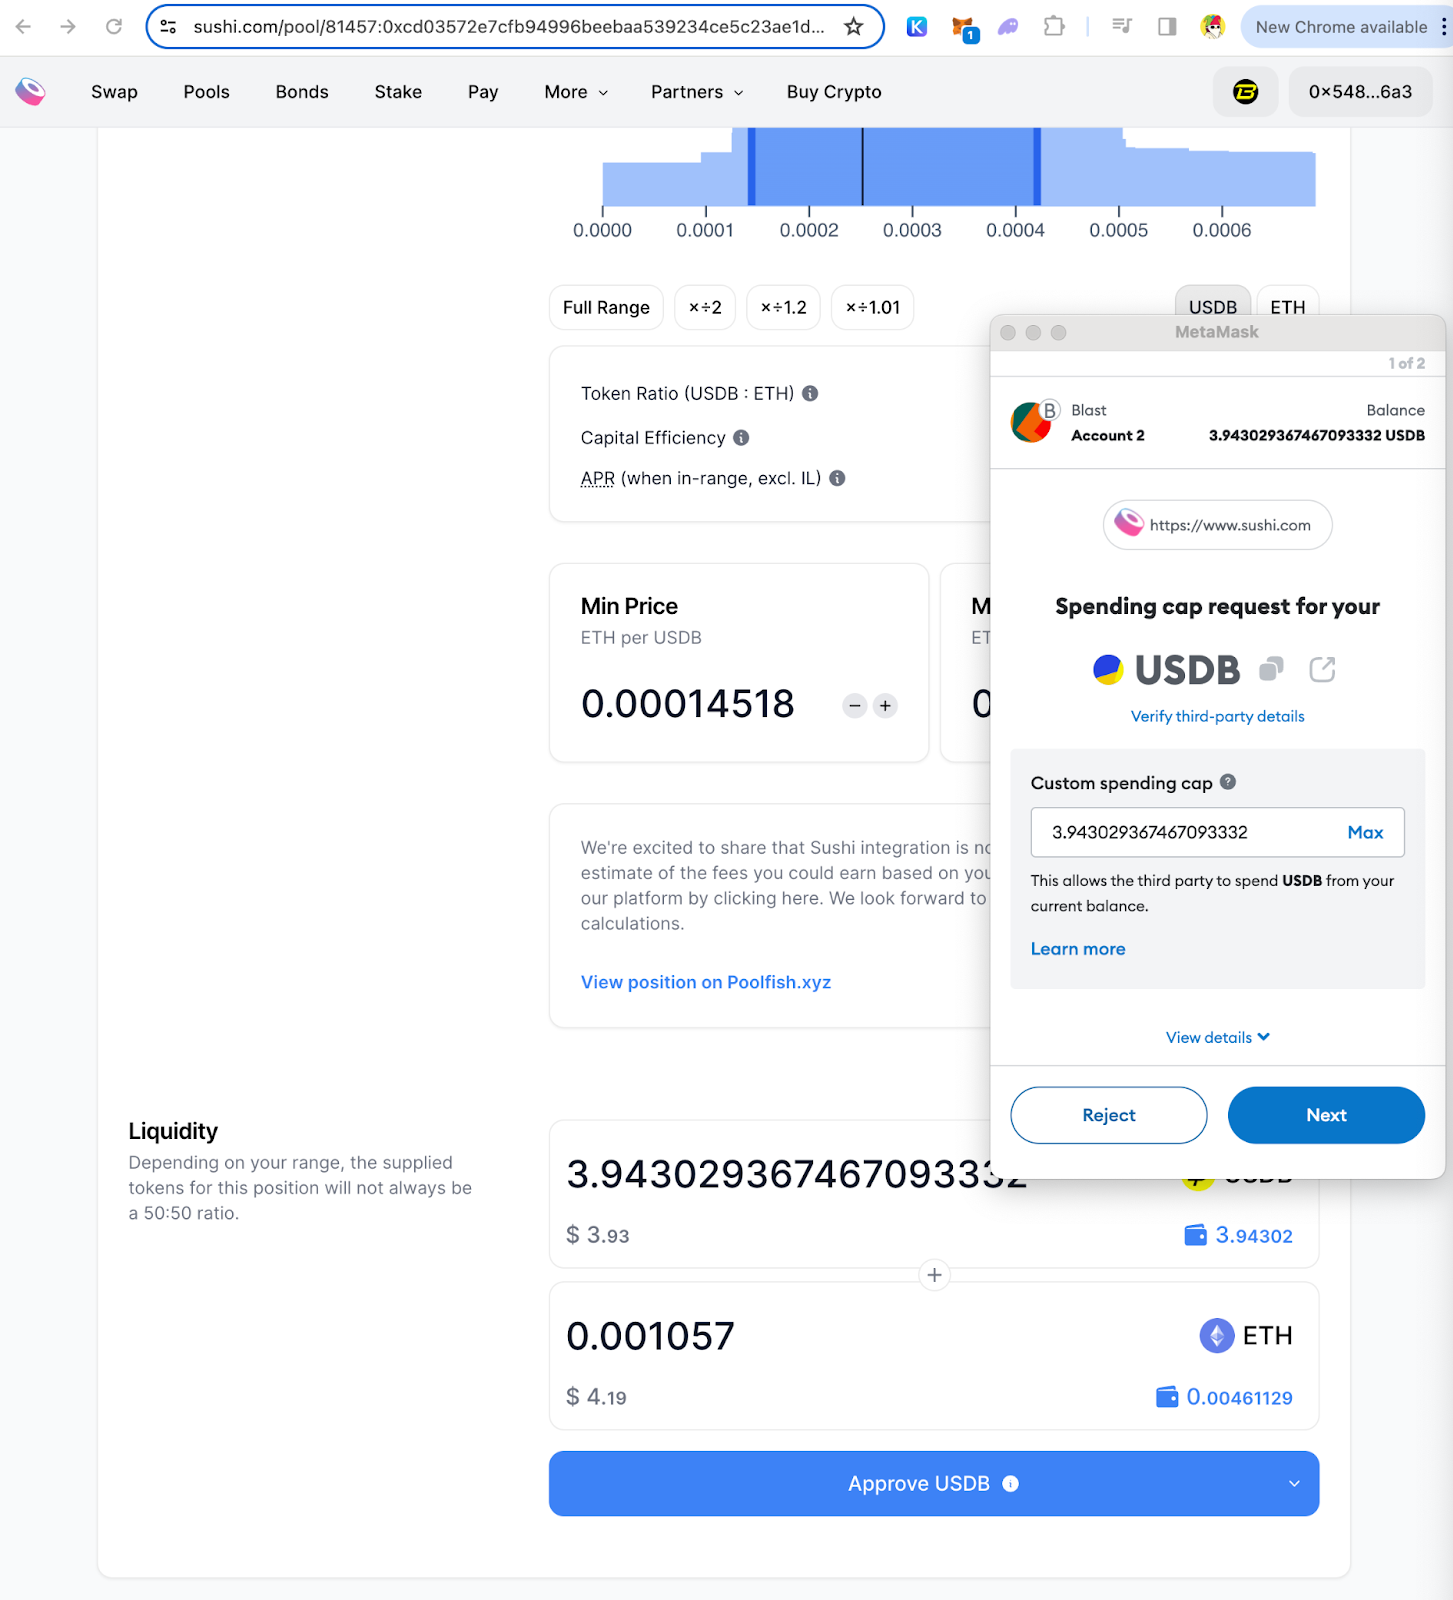
- Approve tokens
Just like swap, you need to approve the spending cap for the tokens. Click “Approve (TKN)” and approve the tokens individually on your wallet.
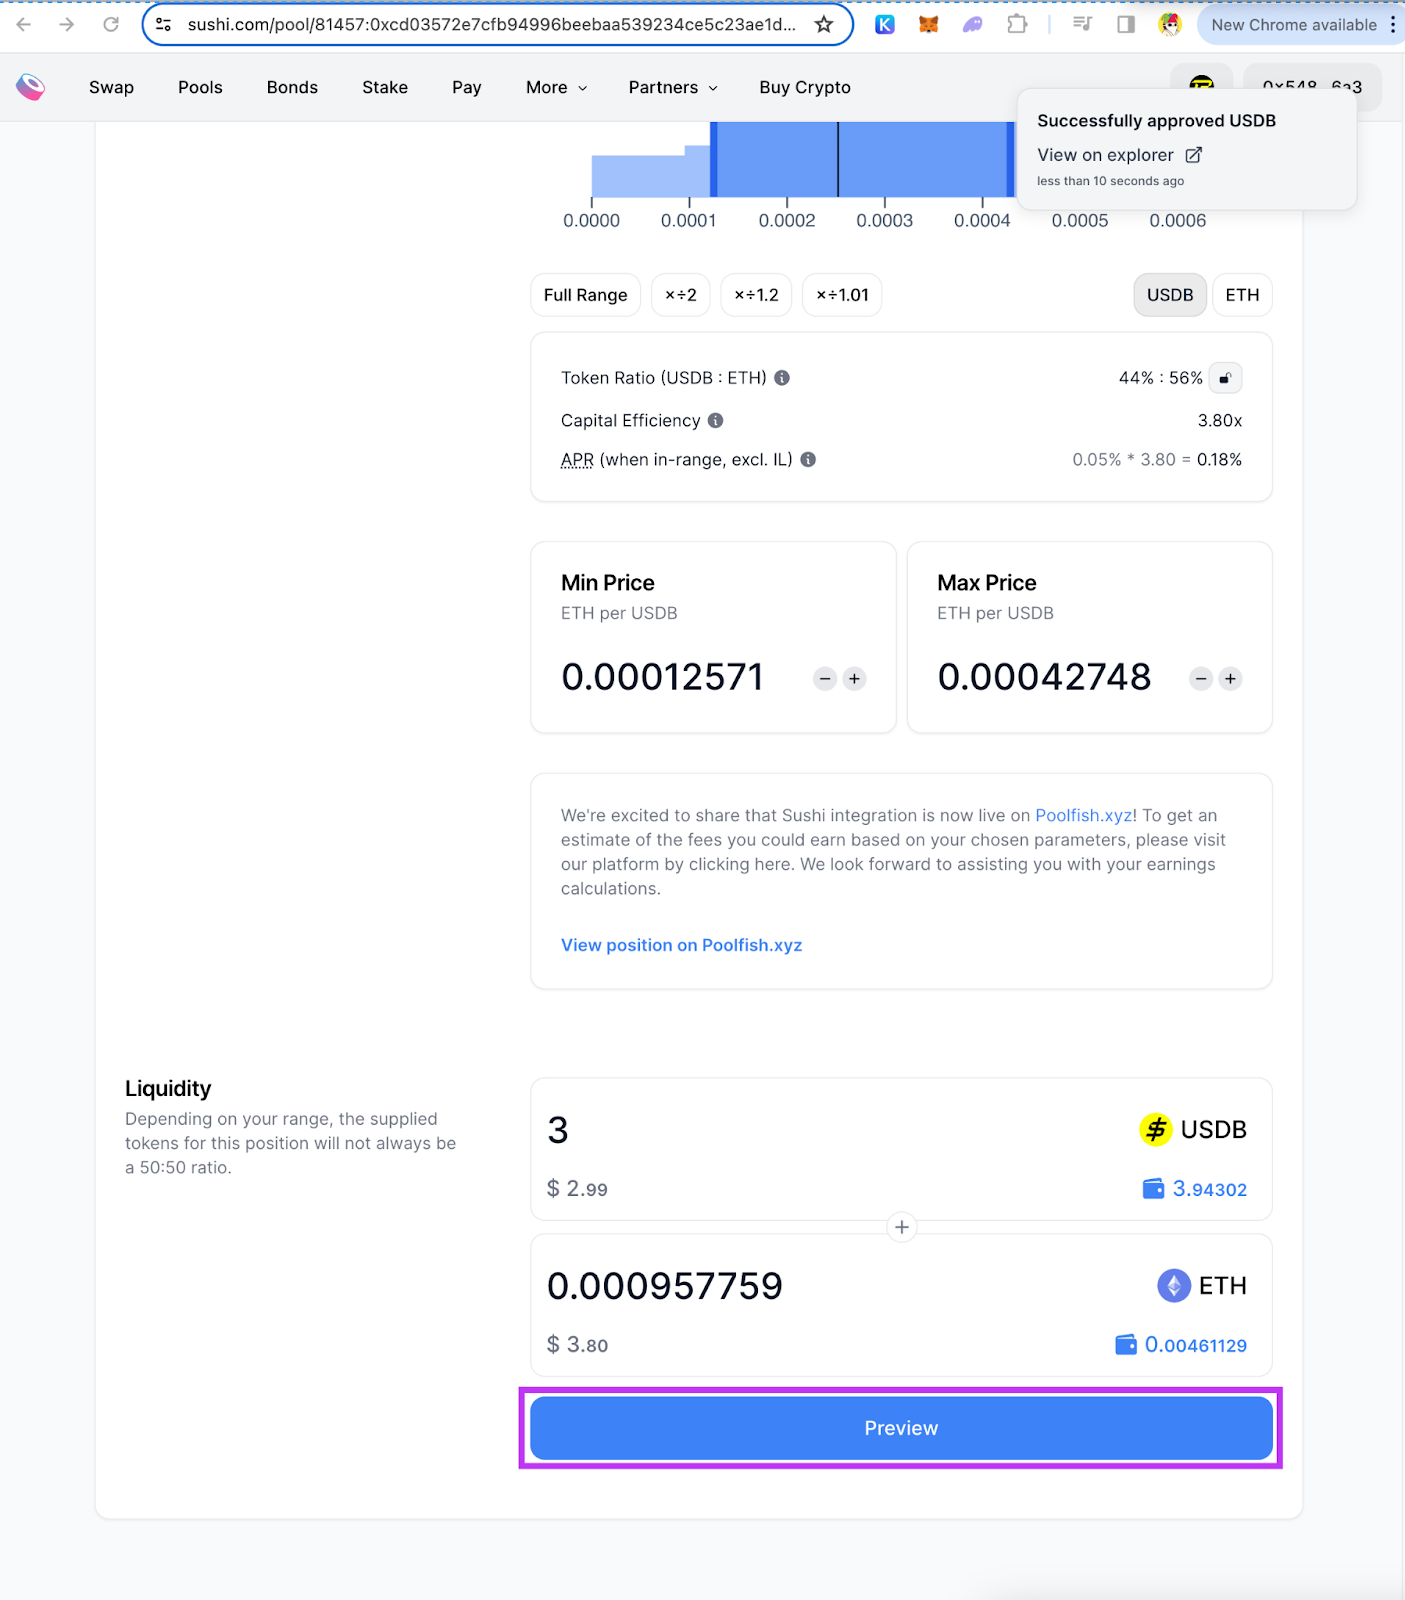
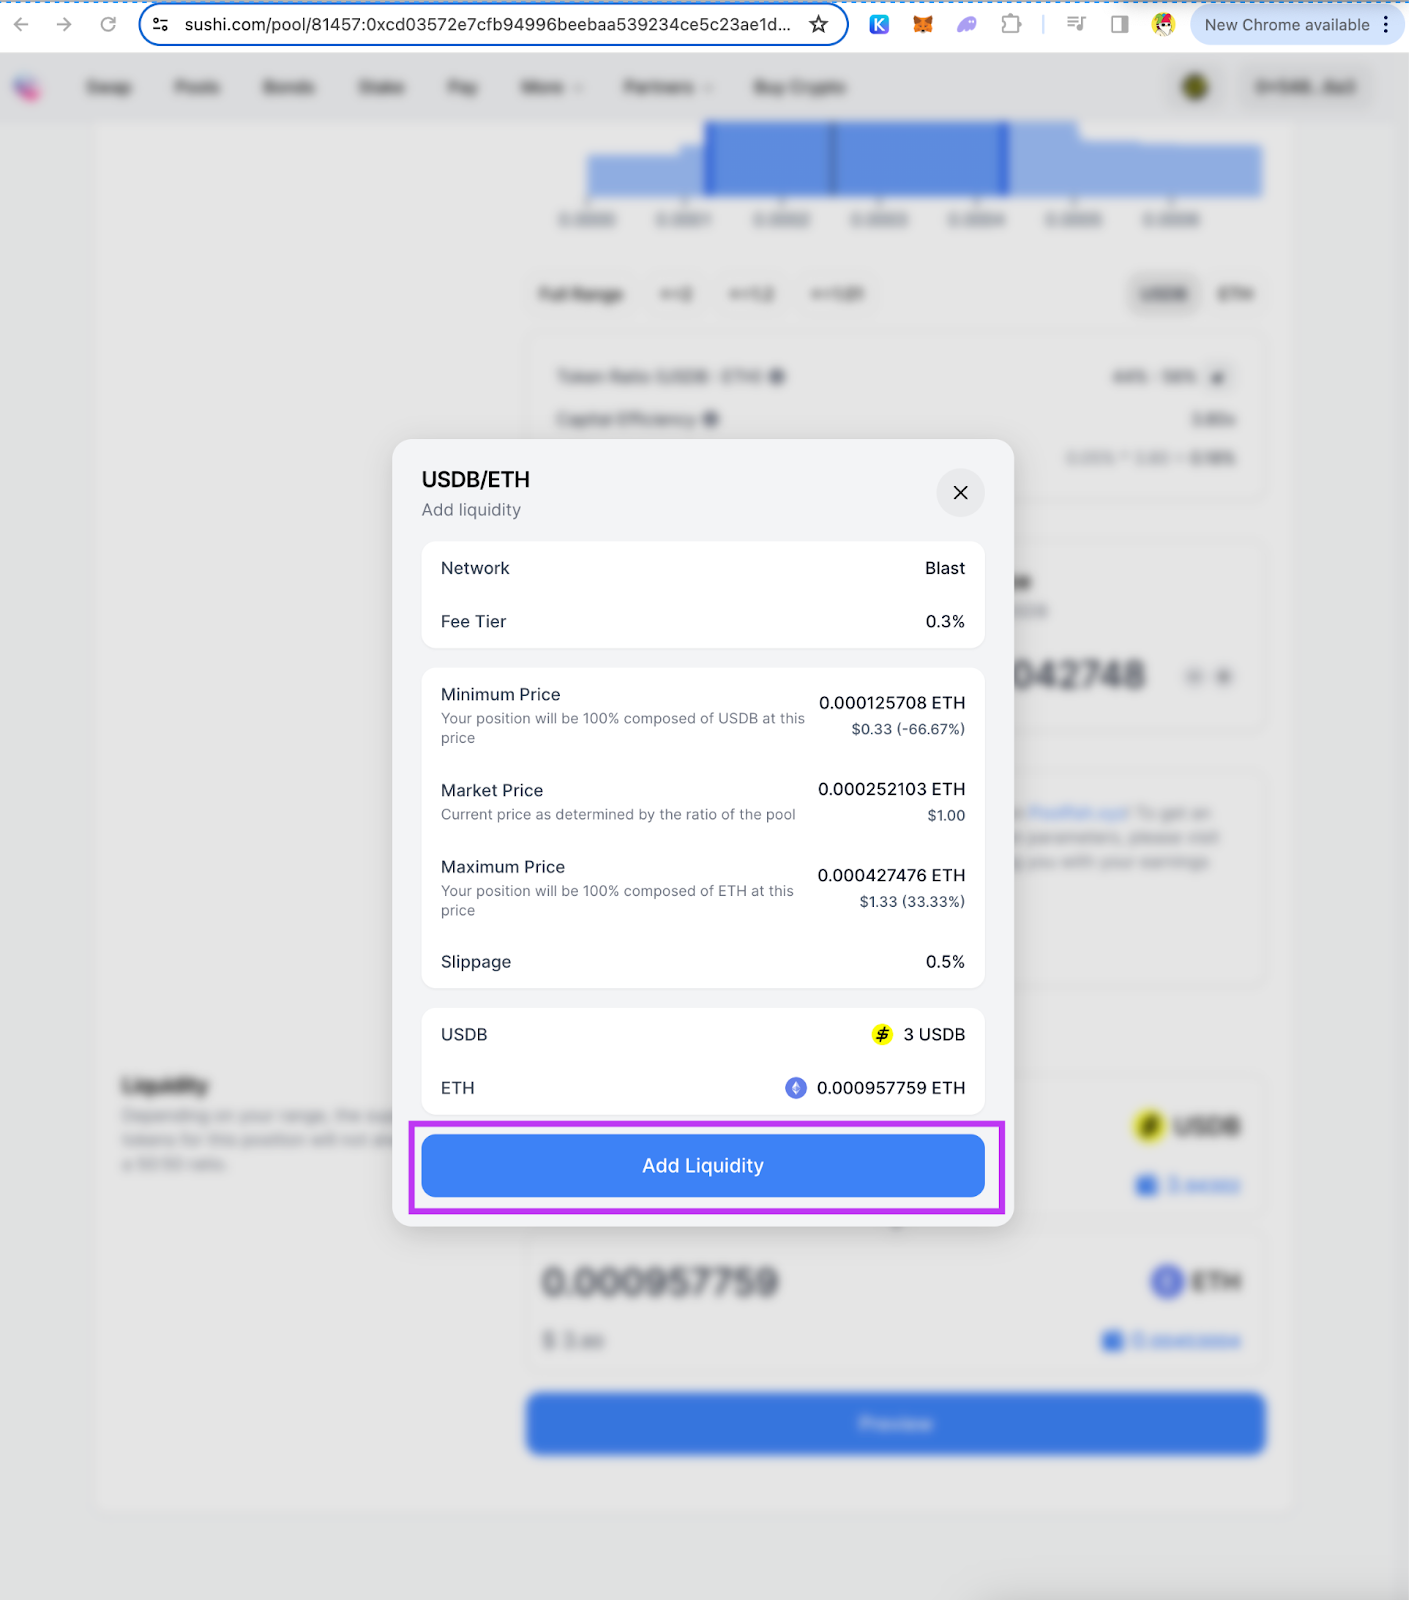
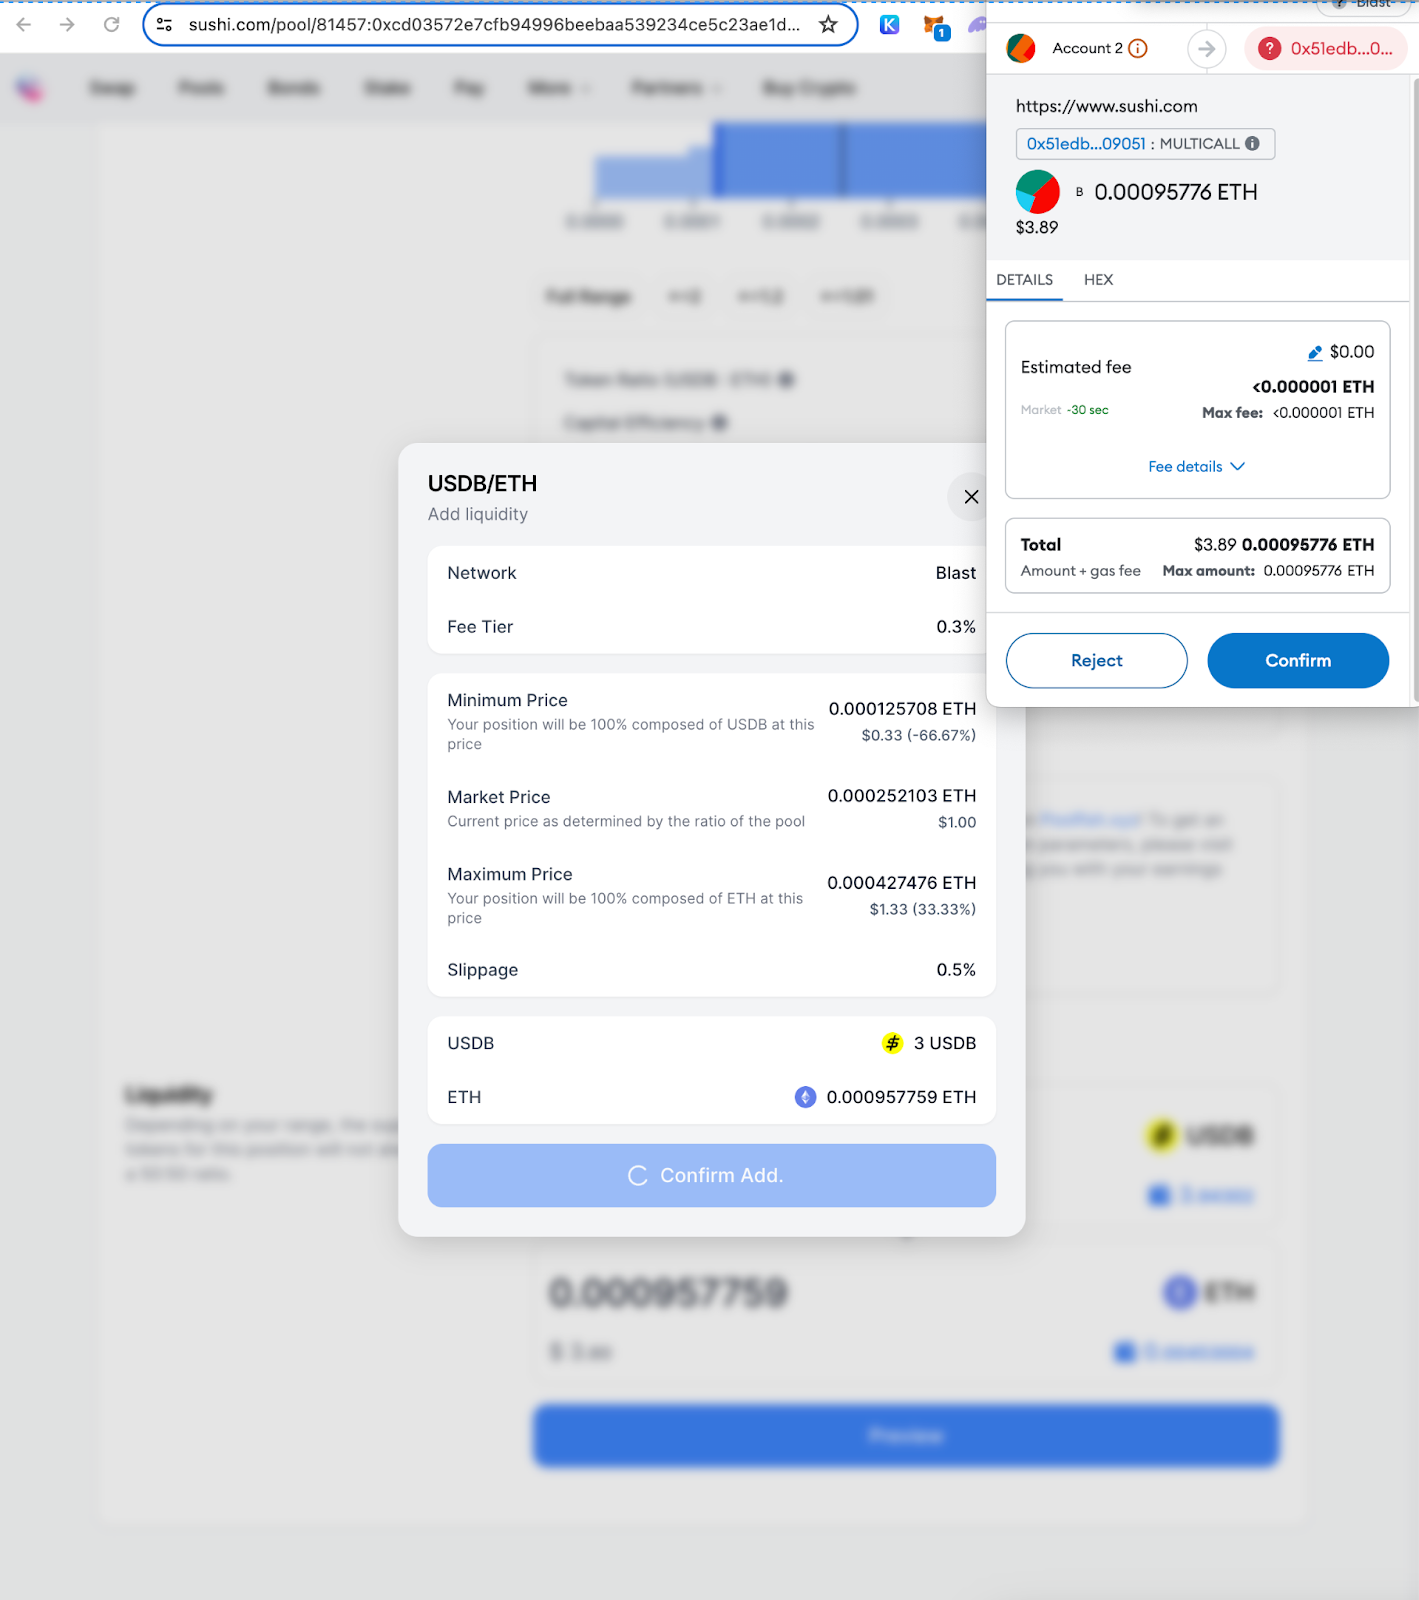
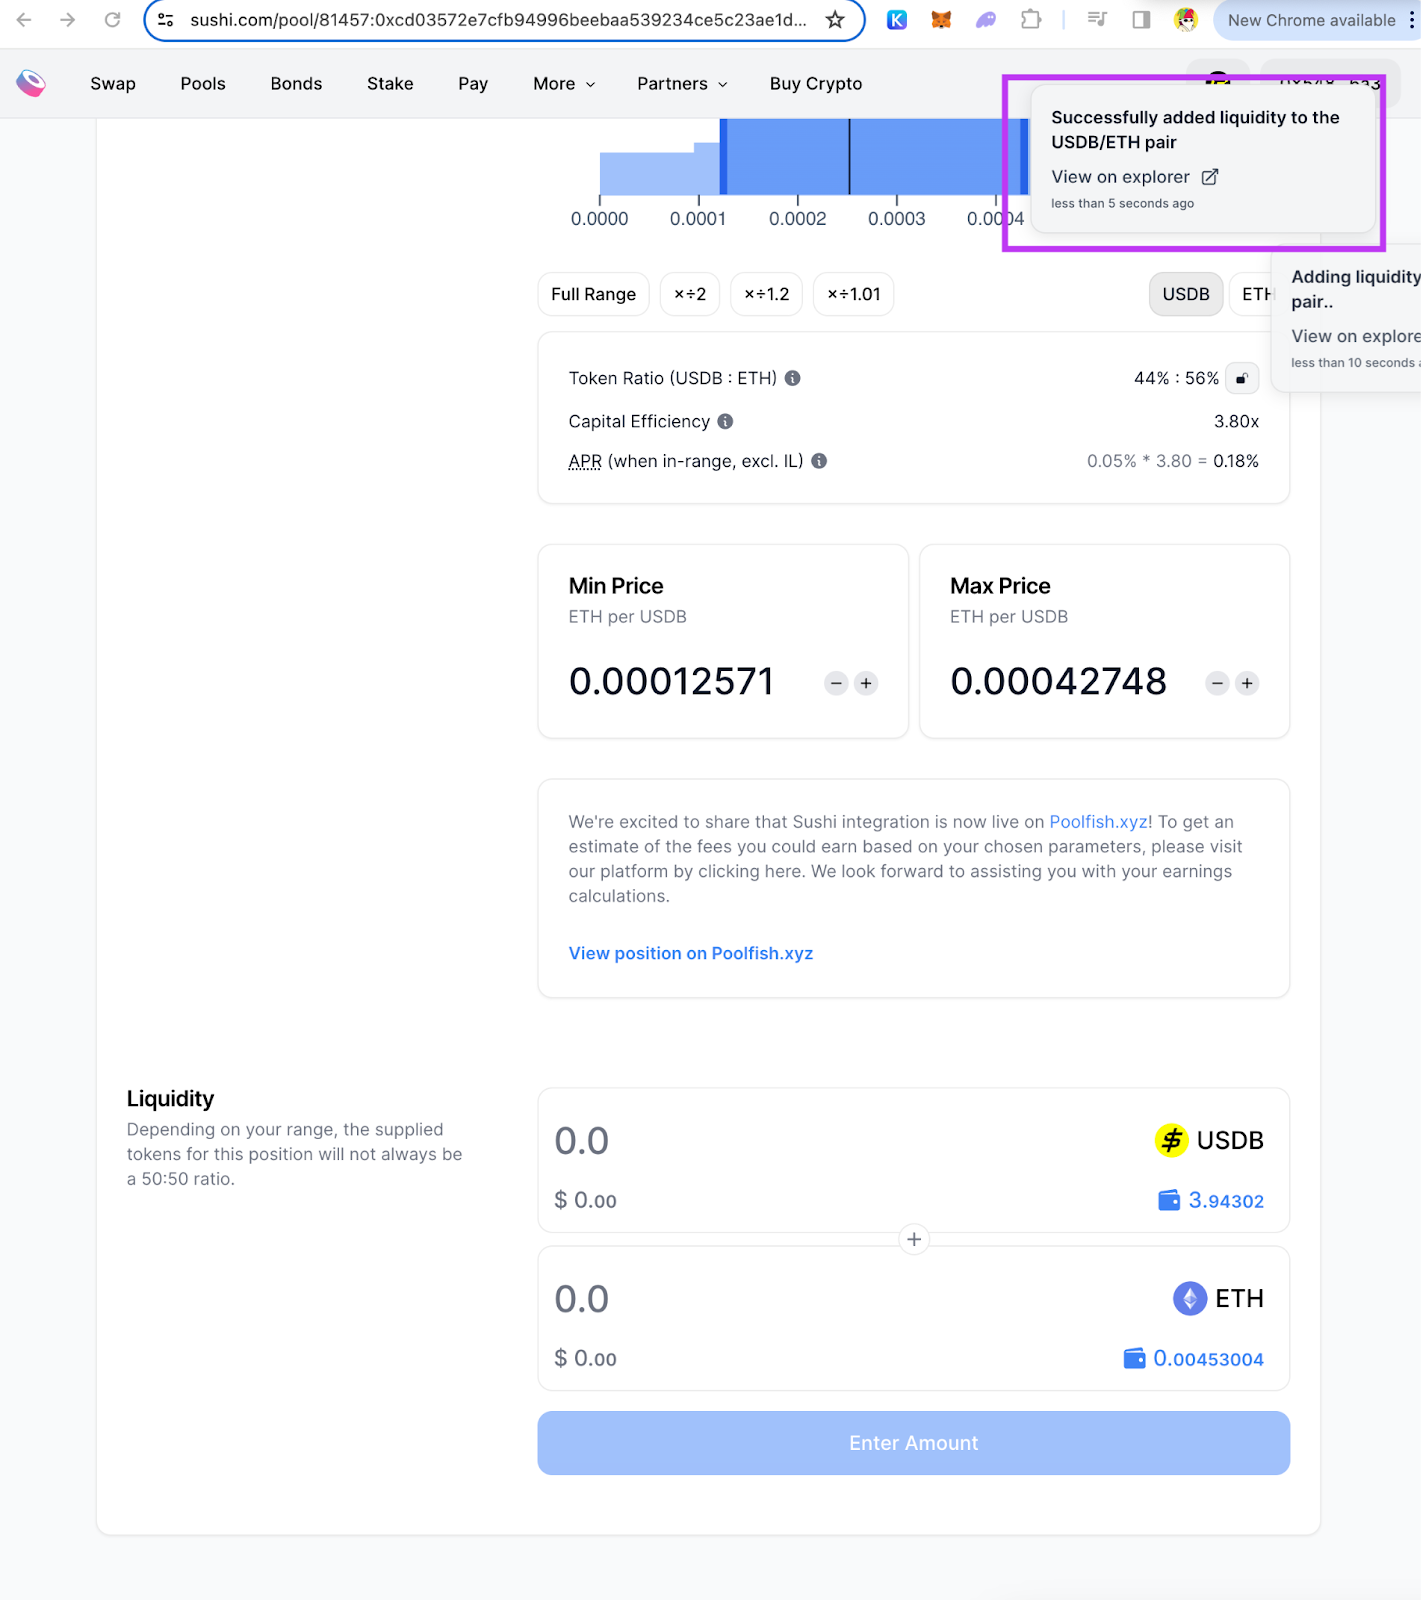
- Review & Confirm
Follow the instructions on the UI. Click “Preview”, then “Add Liquidity”. Confirm the transaction in your wallet.
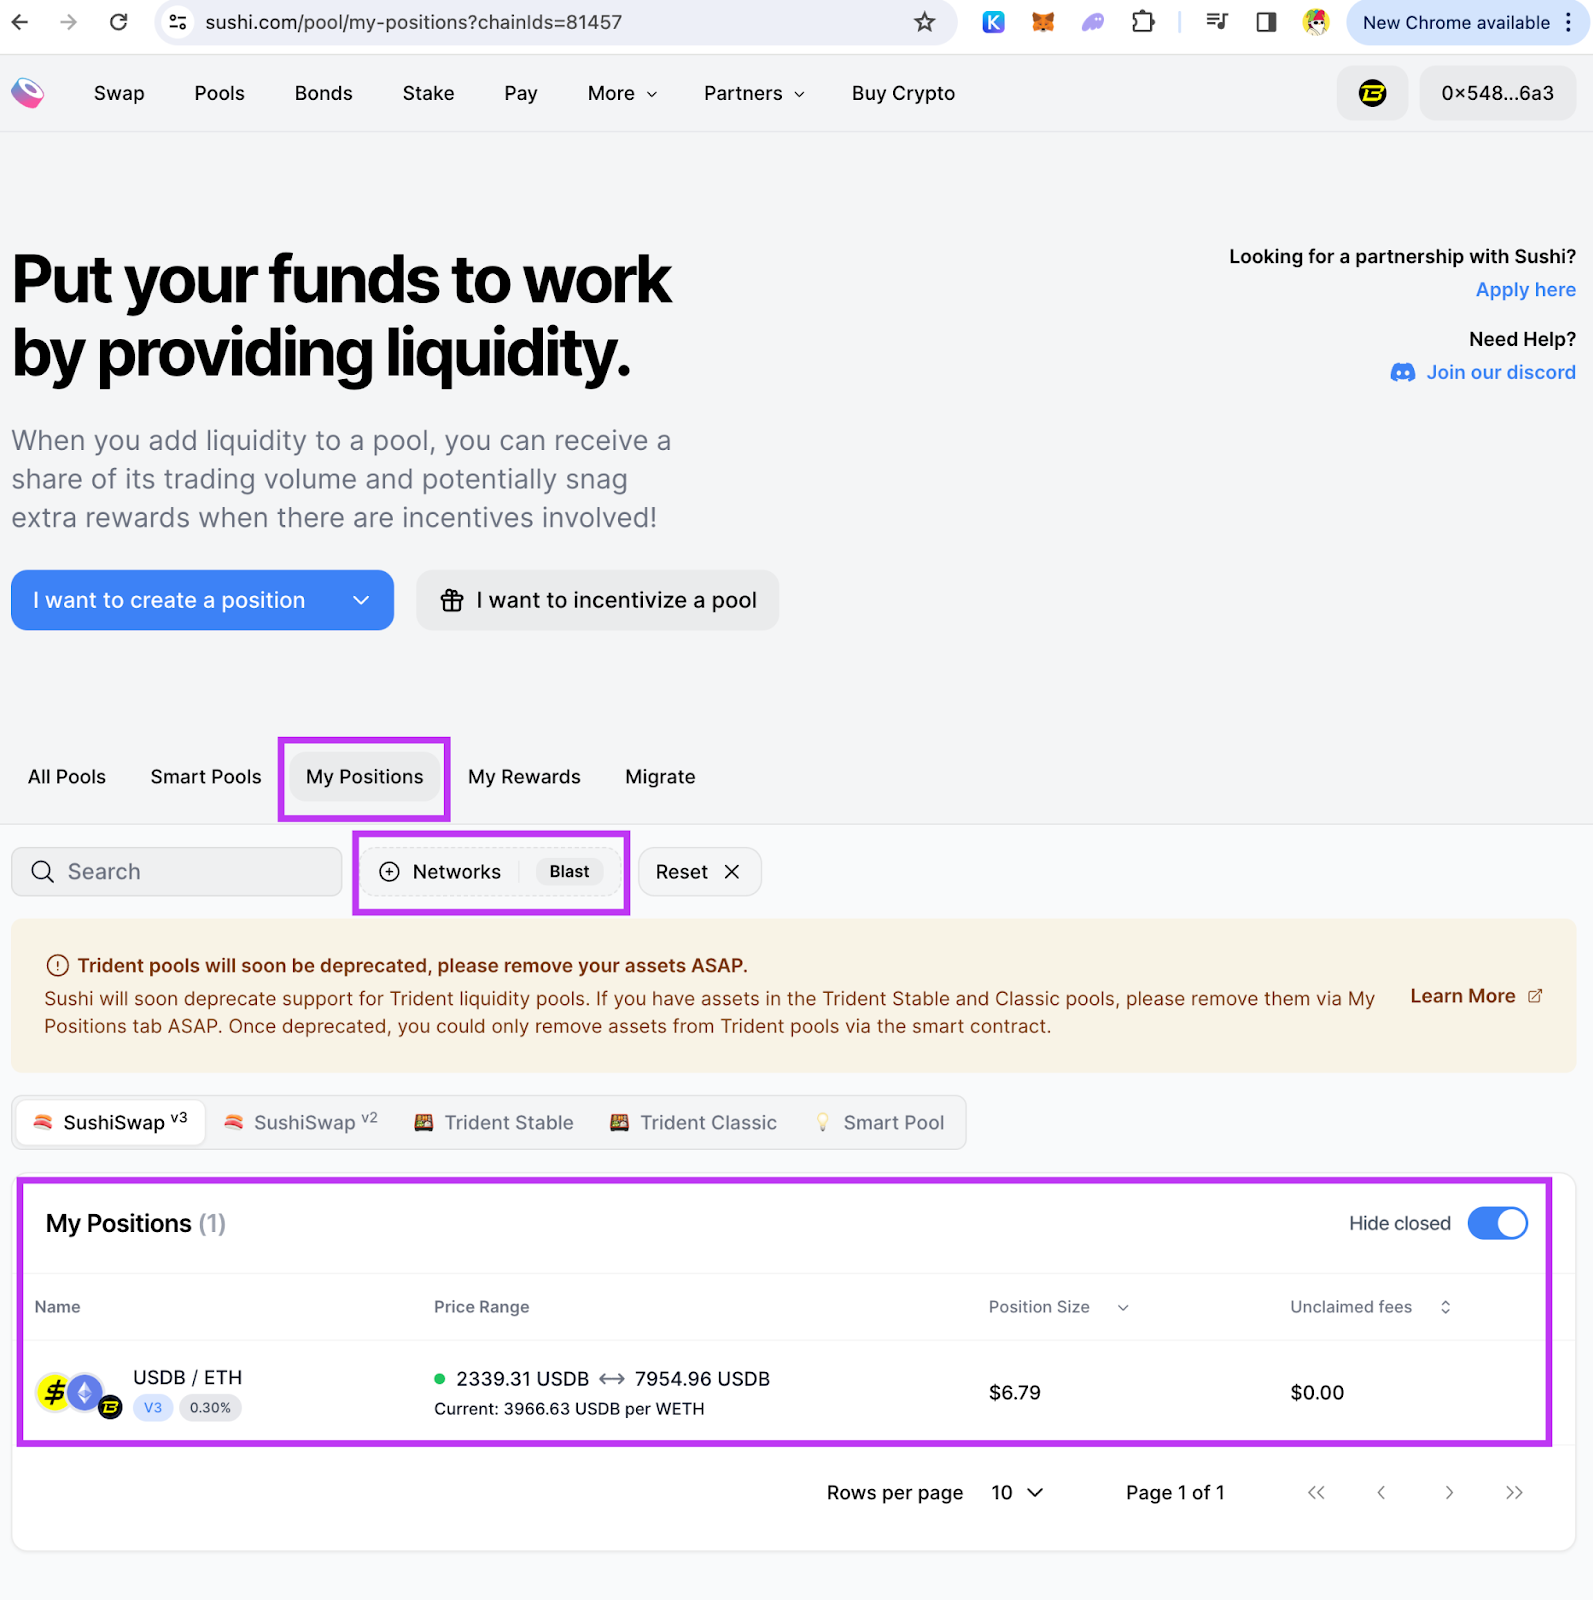
- Manage Position
After adding liquidity, you can manage your position by selecting “My position” under the Pools UI. This allows you to adjust or remove your liquidity as needed.
Important Links
Blast Bridge: https://blast.io/en/bridge
Sushi Swap: https://www.sushi.com/swap
Sushi Pools: https://www.sushi.com/pool